

Disclaimer: I received a free product for my post! These views are my own and were not
at all influenced by the party who gave me this opportunity..
 “Shabby Chic”, “Country”, “Vintage”, and “Rustic”…what do they all have in common? The are some ways I choose to describe the vision I have for my home. Since these styles are very popular right now, I decided to start changing up my home decor. I received some burlap napkins from BurlapFabric.com and, since I had extras, I made this beautiful framed burlap wall hanging.
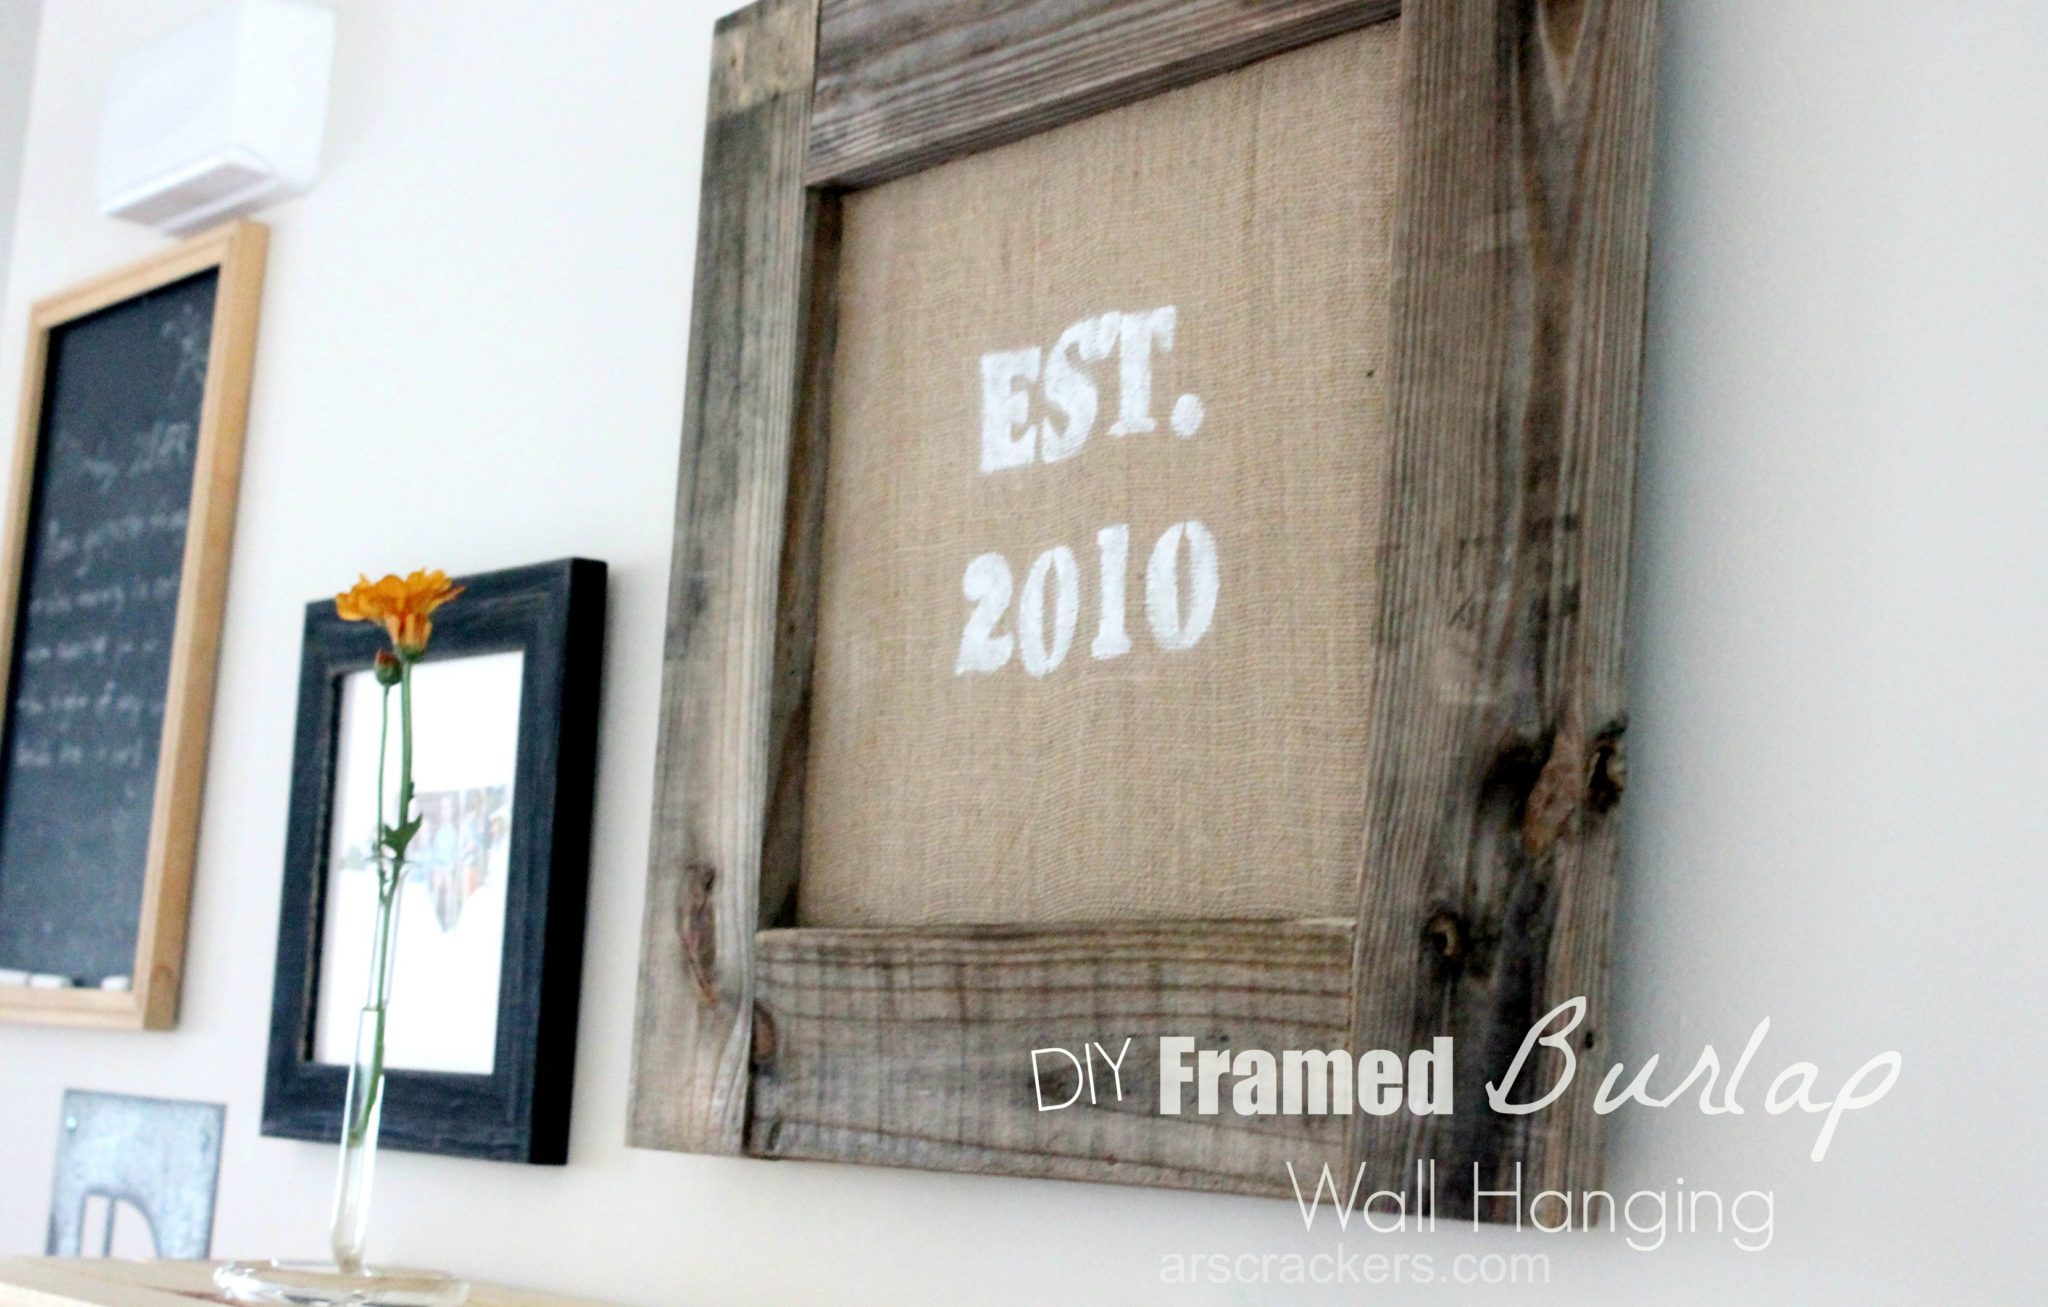
This piece of art was actually fairly simple to make and inexpensive. In the center, I added our year of marriage, when our family was established. Not only does this look great with the frame, but it also adds a personal touch (and reminder of our time together) to our living room.
I decided to keep this framed piece for myself, but these would make great personalized gifts as well for weddings, birthdays, Christmas, or Mother’s/Father’s Day. You can include the “established” year, a monogram, a name, or even a painting if you are up to it! Make it sentimental and special.
Note: I trust you to make this responsibly, but as with all tutorials with power tools and sharp objects, I am required to remind you to use these with caution! Don’t forget the safety glasses!
What You Need
- 14″ x 14″ burlap napkin
- an old wood pallet, pulled apart
- nails (consider the material and get the proper ones) or screws (what we used for ease)
- something to cut the wood (we used a circular saw)
- hammer or electric screwdriver (depending on if you are using nails or screws)
- printed design or pre-made stencils
- X-acto knife (if using your own design)
- masking tape (I used delicate surface FrogTape)
- white spray paint, white acrylic paint, or both (I used both)
- sponge brush (if using only acrylic) or paintbrush (if using both)
- staple gun with staples (nails should work too, if needed, but staples were easier and fewer were needed)
- mounting wire (kit)
Directions
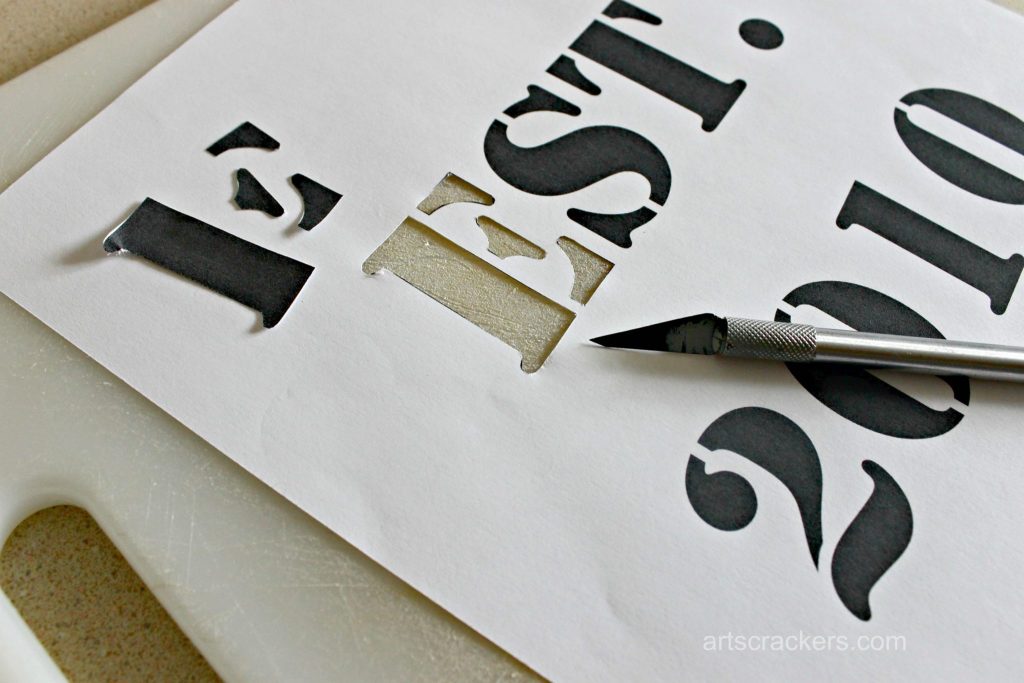
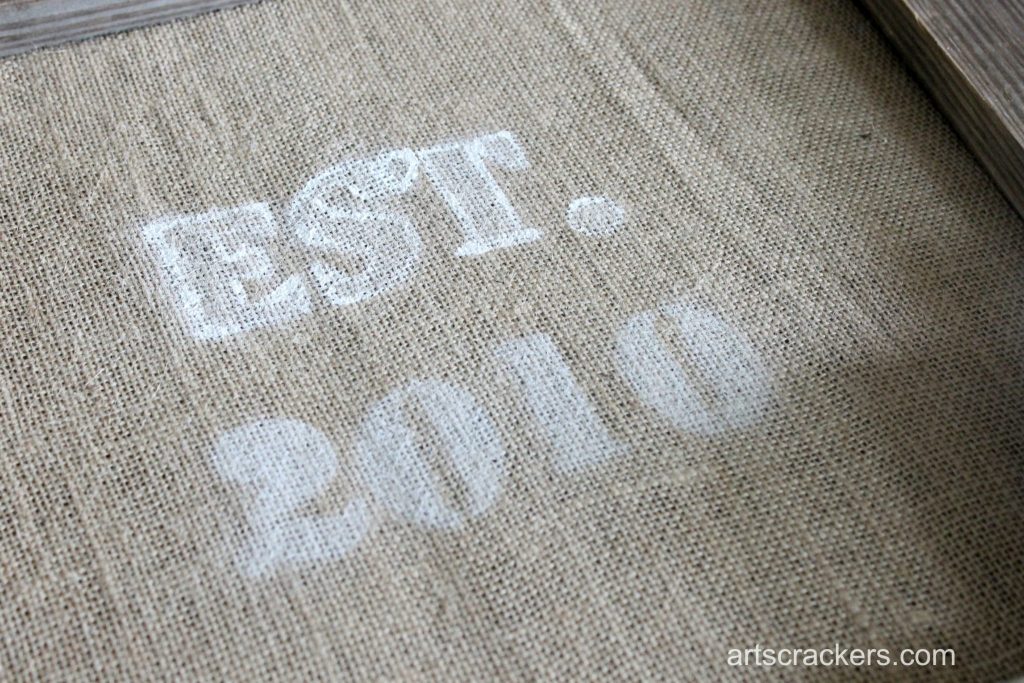
1. First you will want to prepare your stencil. If you are using store bought stencils, great! I made my own, so I created a giant “EST. 2010” using a stencil font on the computer, centered everything, and printed it on regular printer paper. If you have cardstock, this would be easier but it is not essential.
2. On a hard, flat surface (such as a plastic or wooden cutting board, so you do not ruin your table or counter), very carefully cut out each piece of your design, using the knife, to create your stencil.
 3. Center the stencil on your napkin, make sure everything is as flat as it can be, and tape the design down. If you are using spray paint, it is best to cover up the extra fabric in case there is overspray. Keep it on a flat surface somewhere that you don’t mind getting paint on, as the paint will seep through the burlap.
 4. Shake the white spray paint can, point the tip forward and hold the can at a slight angle, hold the can back a bit from the fabric and spray light layers back and forth, side to side, until it is covered. Peel off the stencil and let the paint dry. Note: if you choose the acrylic only route, you will simply sponge on the white acrylic paint over the stencils.
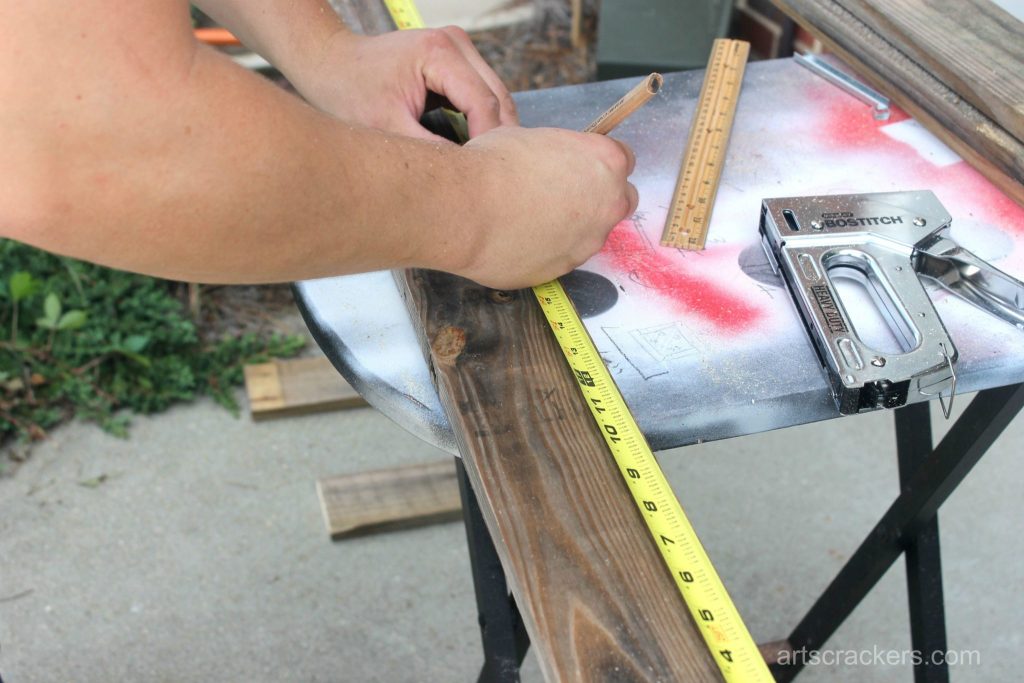
5. Meanwhile, decide how big you want your frame. I won’t bother giving you exact measurements, since I don’t know what size or type of wood you plan to use, but we kept about 12 square inches in the center for the burlap to show through, so the outside pieces were cut into lengths of about 12 inches and 18.5 inches. We then cut four small square pieces to use on the back.
 6. Place the cut wood pieces over top the fabric to make sure they are the correct size (the napkin was not totally square, so you may need to adjust your frame size accordingly), and check to make sure there is enough overlap on the back.
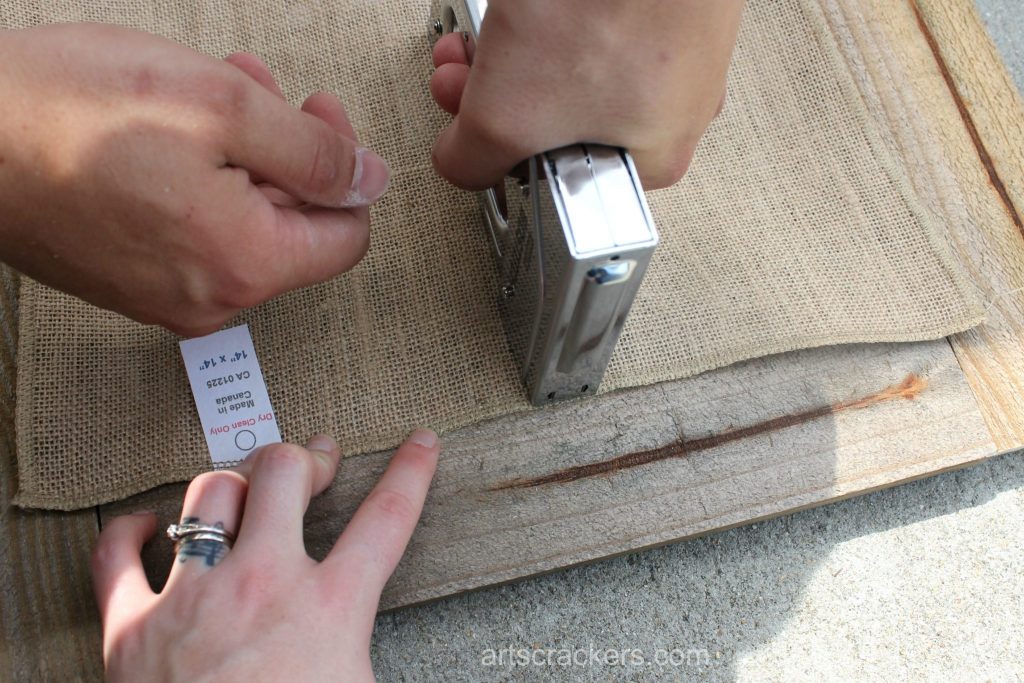
7. Flip the wood upside down in a frame shape, exactly where they are supposed to be, then begin stapling the burlap piece, face down, onto the frame. I started at the top then stretched the piece out and stapled the center of each side then came back in and added more staples until the burlap was securely attached and pulled taut and flat. Keep in mind as you do this that your frame is not yet pieced together, so try to keep everything in place as you work.
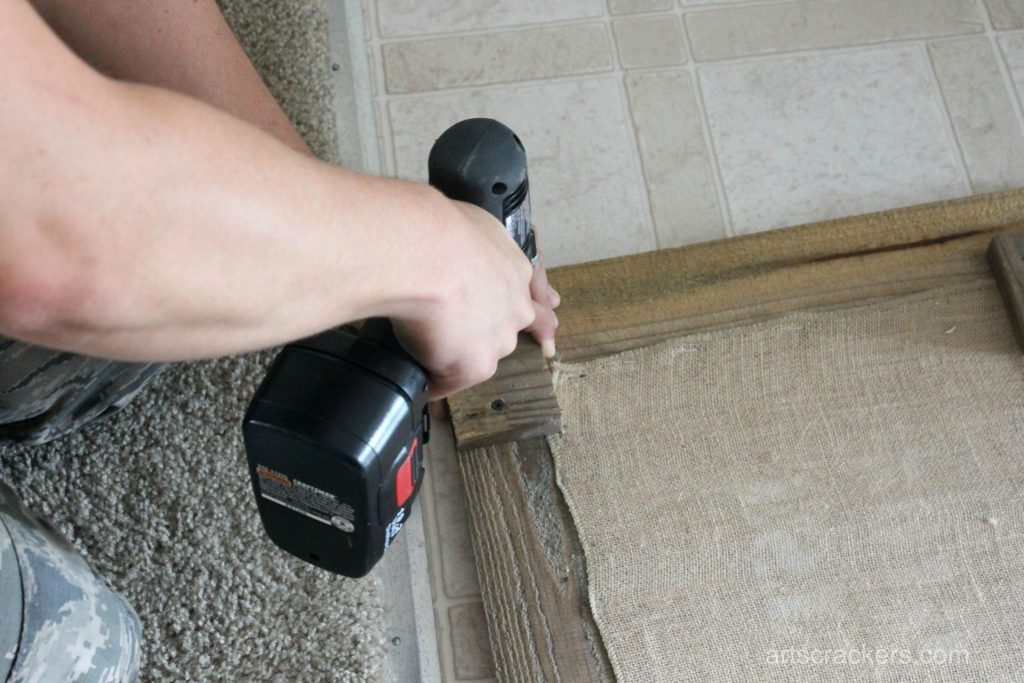
 8. Carefully nail or screw the square pieces overlapping each end of the wood on the back in each of the four corners. This way your frame will stay together and your frame will stand off from the wall. You will want to use short enough screws or nails that they don’t show from the front, but long enough that you get a good hold. If you wish, you can nail from the front to have the nails showing; if you do this, I recommend using older nails so they match the older wood.
 9. Once your frame is solidly together, flip it over to see how it looks. Since I sprayed paint first, I needed to go back over with some acrylic because it was faded and difficult to read. I used the sprayed letters as guidelines to hand paint on some extra acrylic to make the letters just how I wanted them. Let dry.

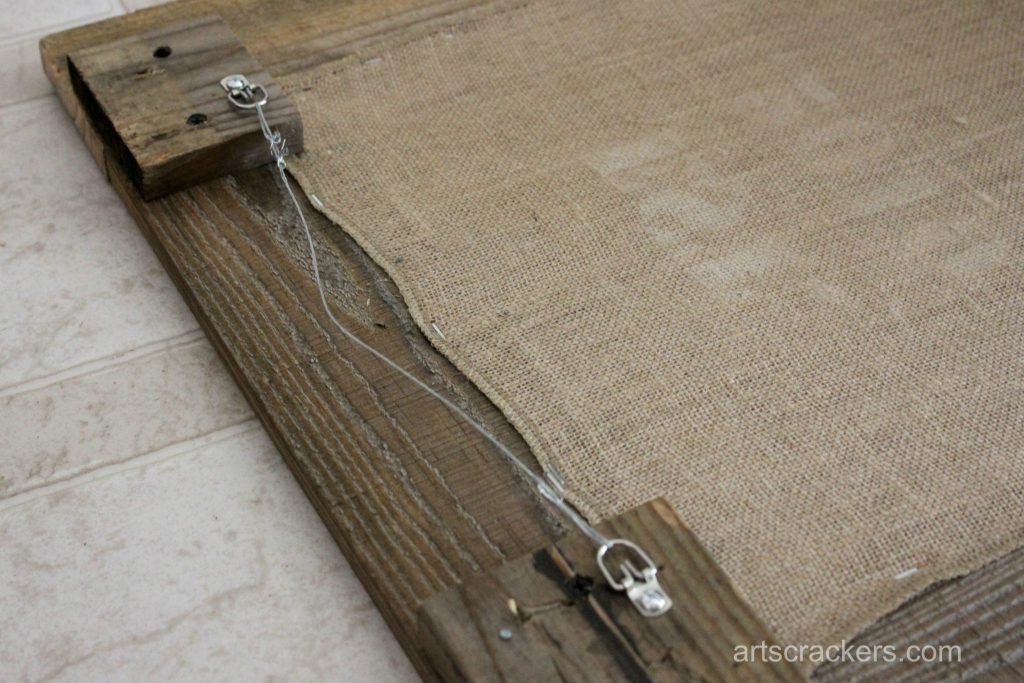
 10. Flip the frame back over and attach the mounting wire according to the package directions. Make sure you mount it onto the wooden squares on the back and low enough down that it will grab the hook/nail and not show once hung.
 Hang your beautiful piece of art in your home or lean it up against the wall on your mantle. These also make a beautiful gift.
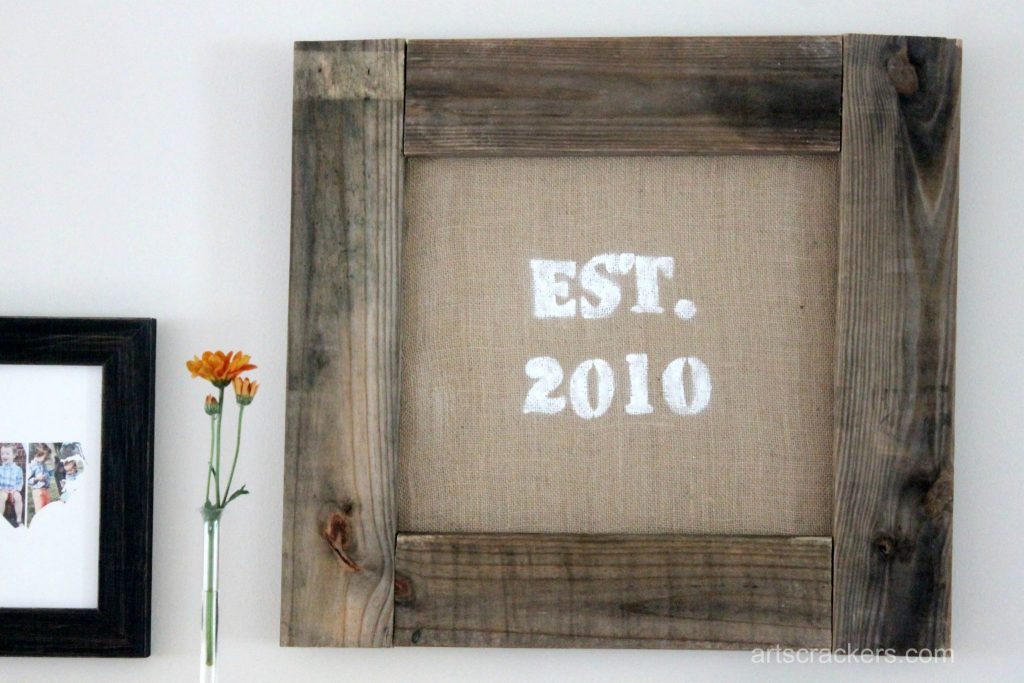 Mine looks wonderful with my vintage/country chic wall. Also pictured: Minted State Photo Art.
 BurlapFabric.com has so many great fabric items from table runners to ribbons and tote bags. They also have fabrics besides just burlap, like cheesecloth and vinyl…even upholstery fabric. I chose the napkins to start, but there are so many great things to make with their products! Perhaps some more of these DIY Painted Burlap Outdoor Pillow Throws!
The fabric napkins will give a great touch to my Blueberry Lemonade Chic patio decor next spring and I love using them to decorate underneath my blog pictures. So simple. So versatile. So stylish.
Check out these gorgeous pearl and burlap napkin rings from Moms & Crafters too!
As with all burlap, before using or creating with these, shake them out outside and read for care instructions to clean them.
Follow Burlap Fabric on Facebook!
Who will you make this framed burlap wall hanging for? What special picture or words will you put on it? I’d love to hear from you in the comments below!
Know someone who could use this? Hit the “share” buttons below! Be sure to follow Arts & Crackers on social media (buttons at the top right of the page.)You May Also Like


Beautiful job, Alyssa – you are so talented! And I love those napkins – clever move there. Though I think I like them as napkins too, and for photo staging 🙂
Thank you so much! Yes, I’ve already used them in many food photos too and ended up cutting up another extra to make bunting for a wall decoration!
Such a whimsical and sweet idea – I love it!
Thank you, Sarah!
This looks lovely 🙂 I think I’ll have a go making one. Love bec xx
Thank you! It ended up being pretty simple and I love how it looks on our wall.
Lovely. Really good idea.
Thank you, Lina!
I love this!! I like your idea of putting the year of marriage in the frame! I would love to branch out of my comfort zone to do things like this!
Thank you! This is a great DIY project to start with–simple and stylish!
Pingback: Trash or Treasure? | IfItBringsYouJoy
Pingback: Wall Decor Ideas For Your Home - Scrappy Geek