

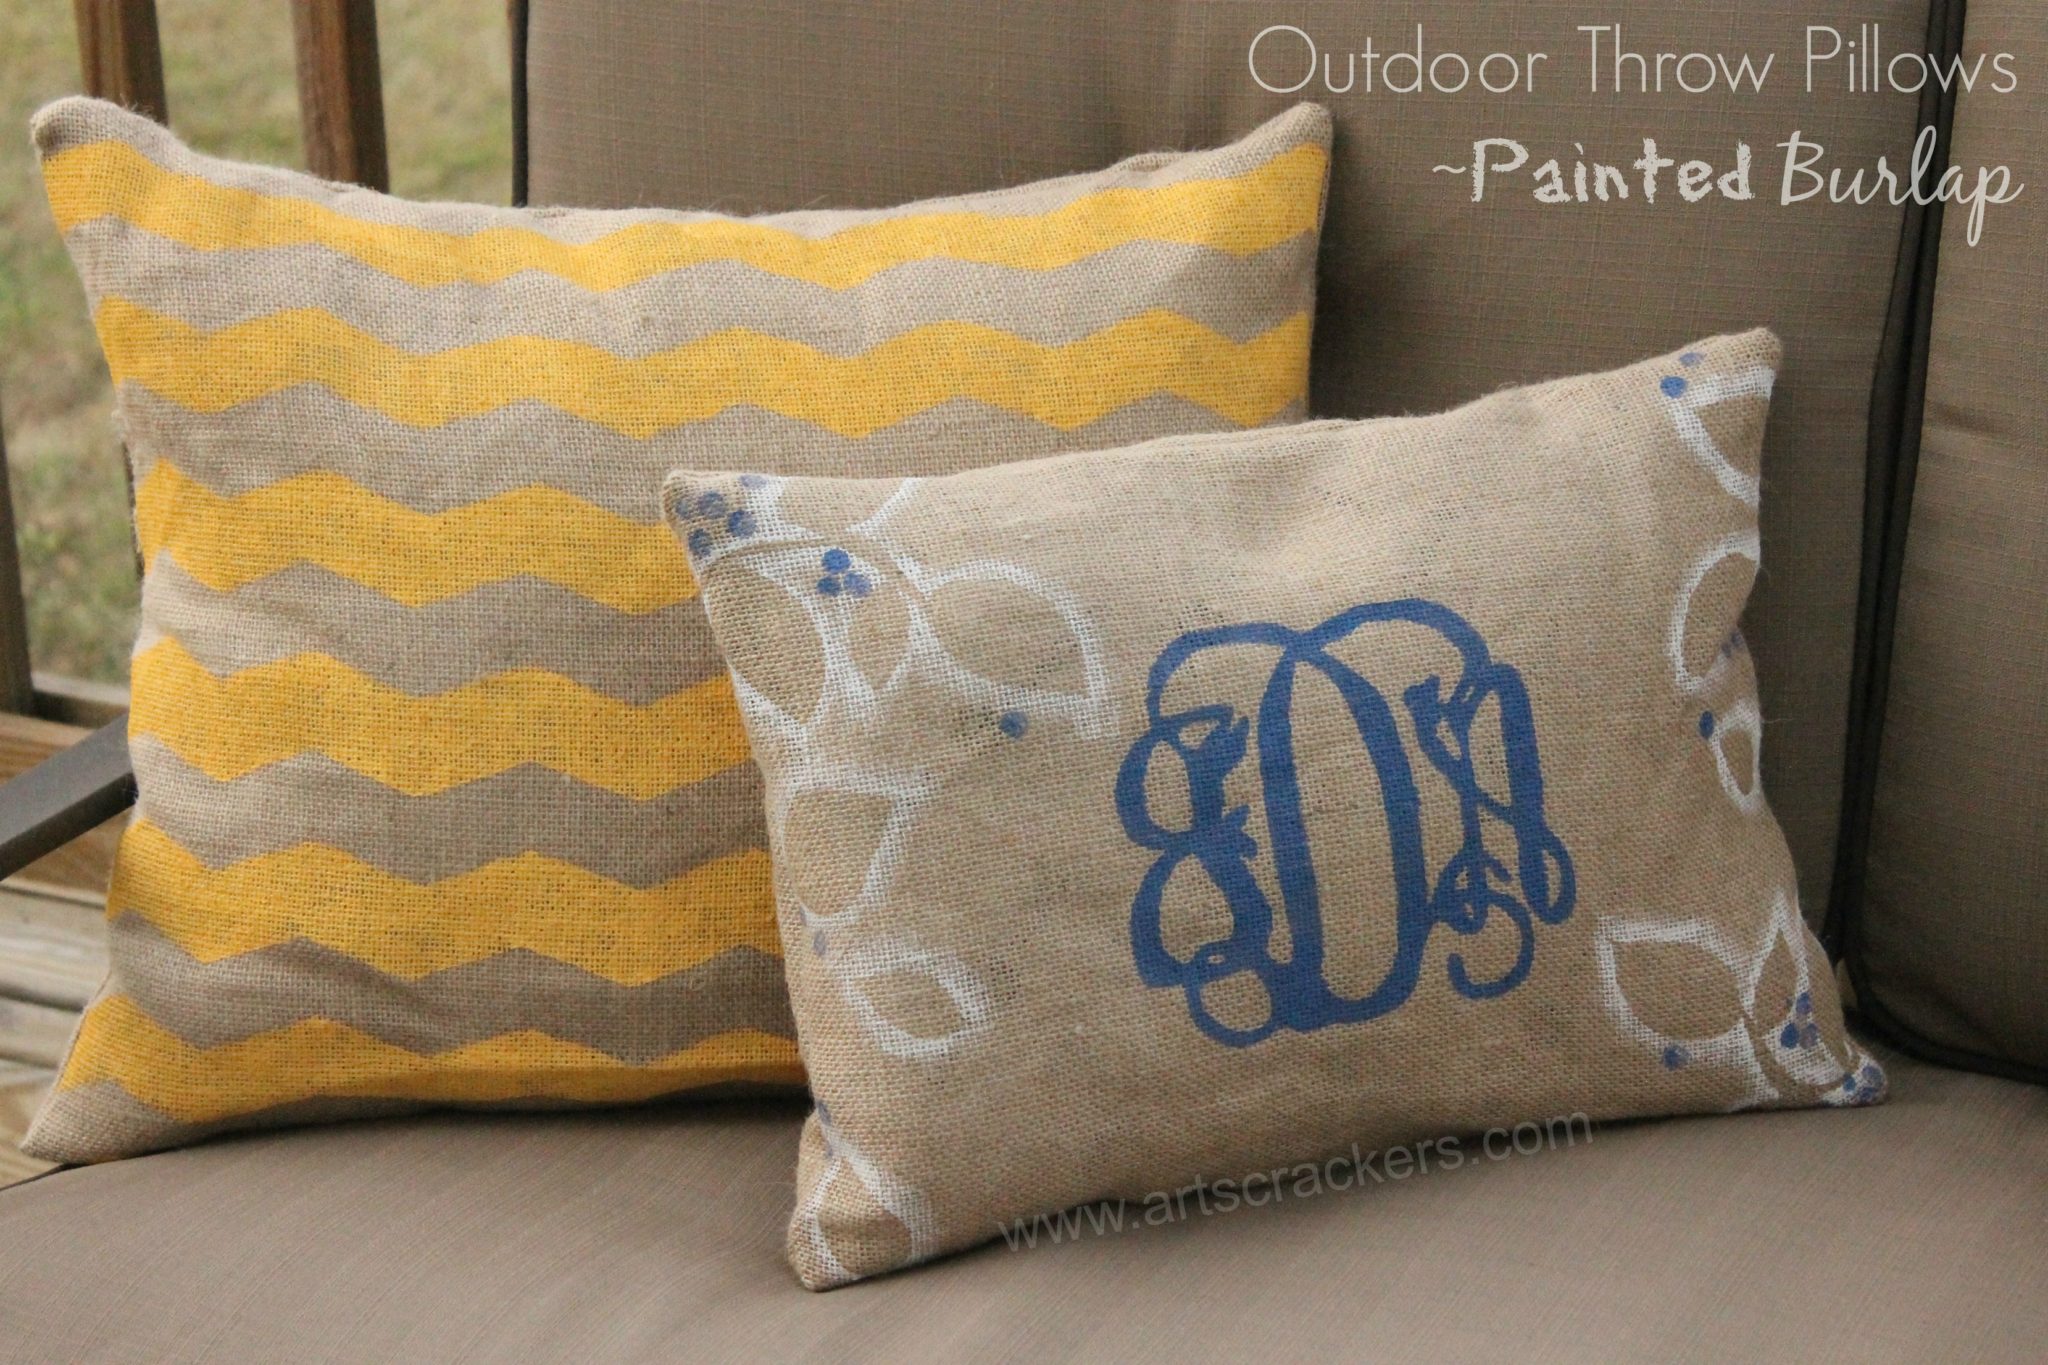
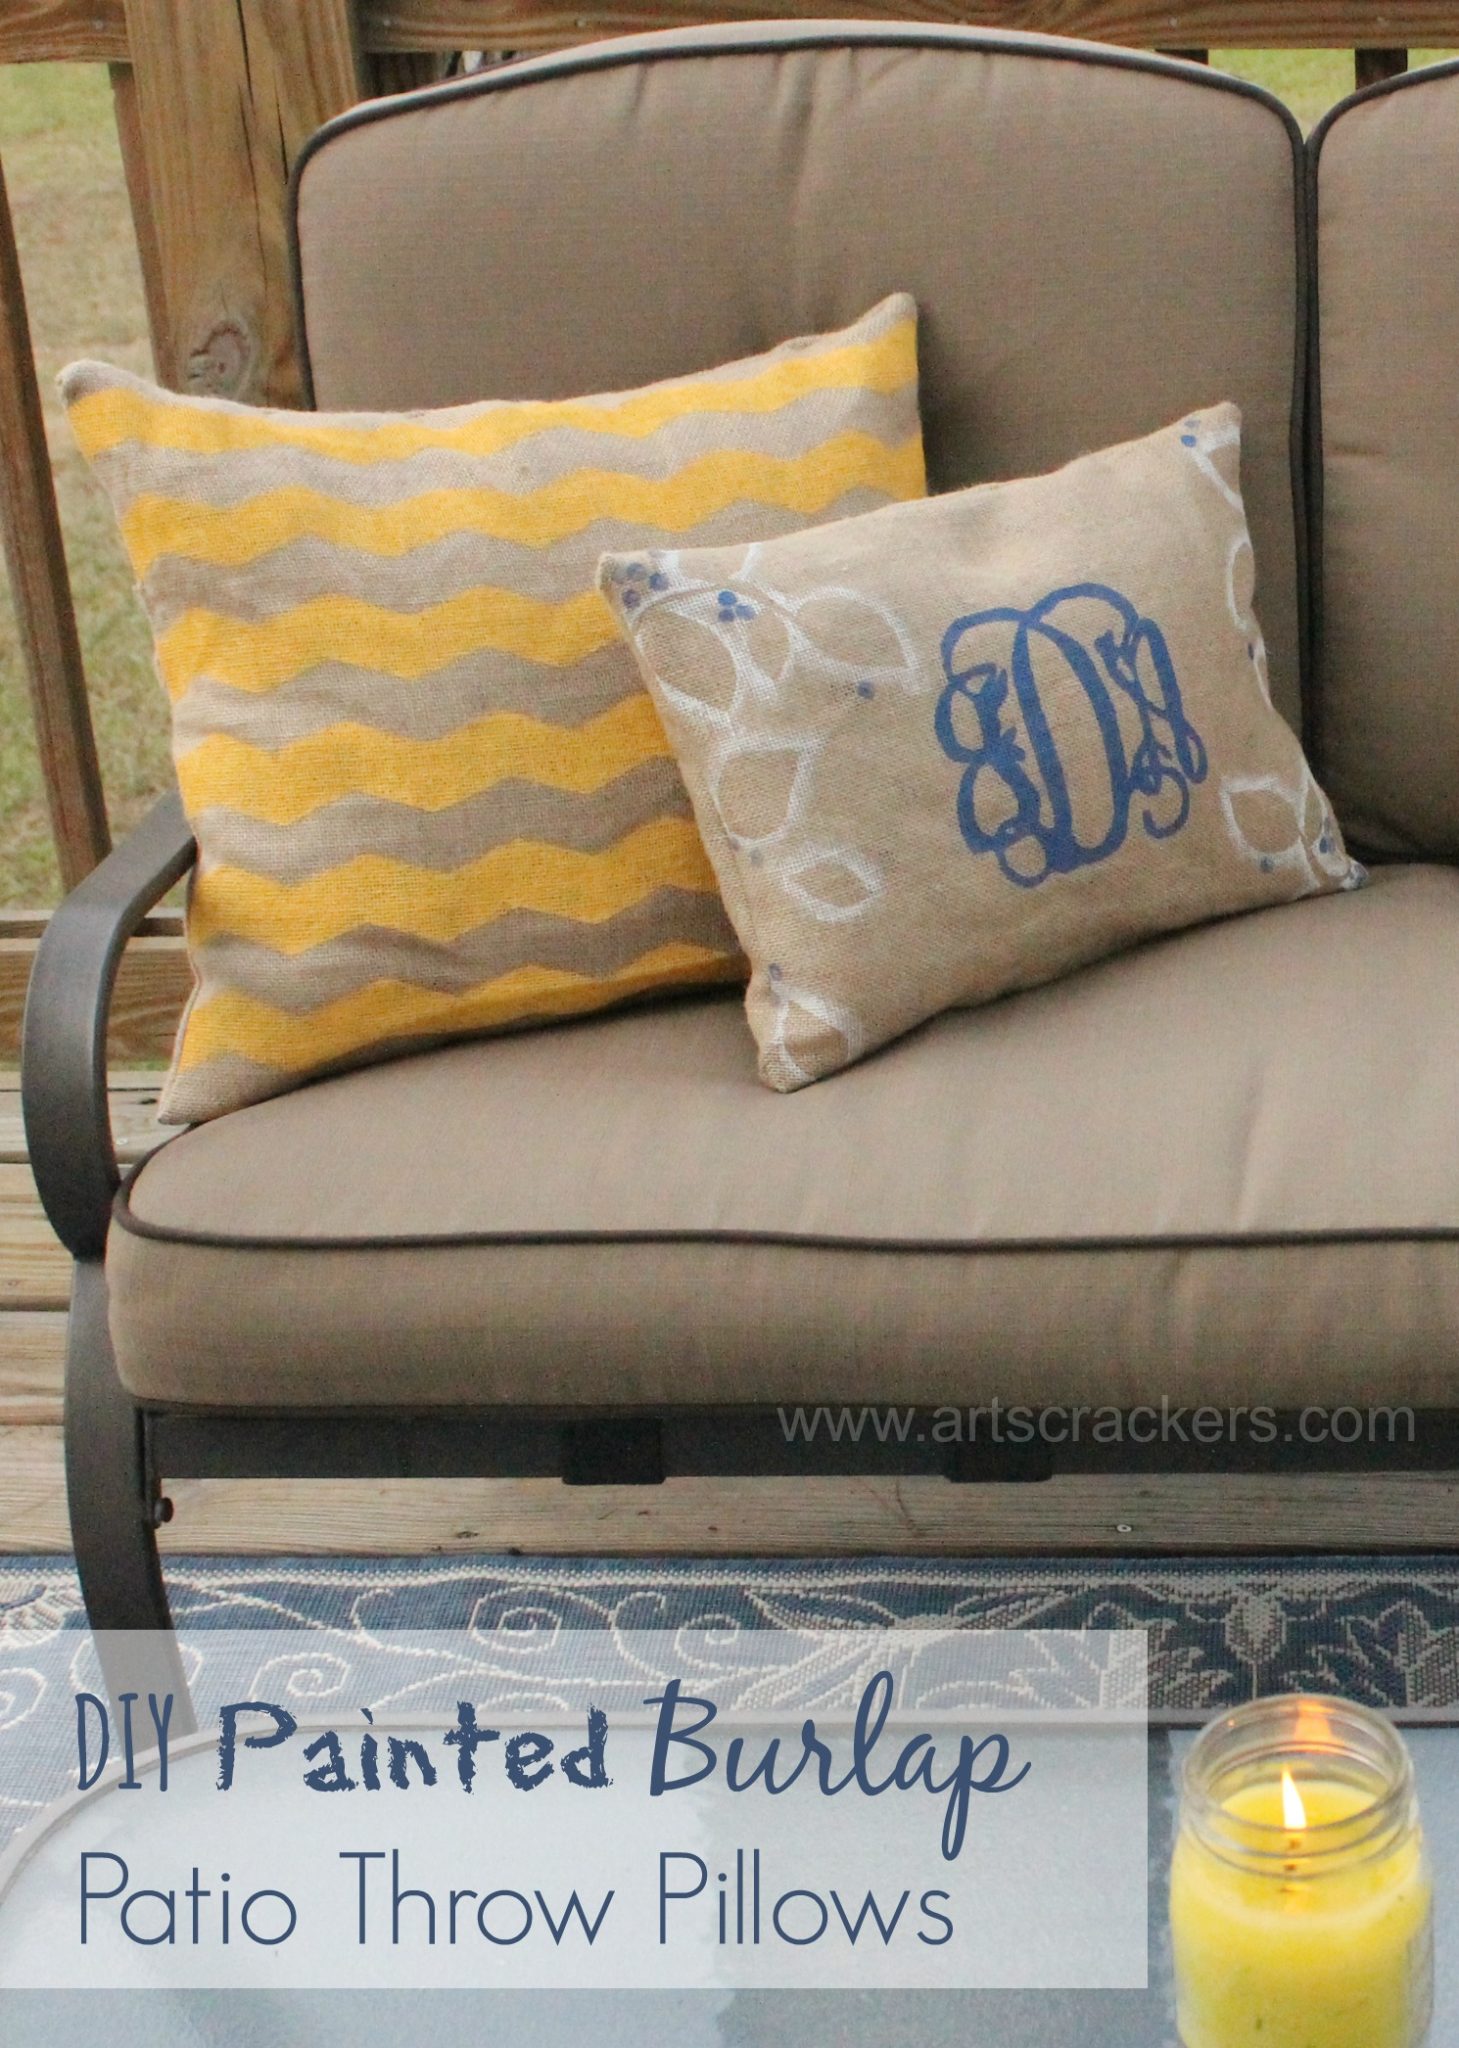
If you want your patio makeover to look complete, you need to toss in a few throw pillows. You might have started to notice my All Decked Out Patio Makeover theme is “Blueberry Lemonade Chic” so I wanted to custom-make some Painted Burlap Outdoor Throw Pillows to coordinate.
Now, I know it’s getting a little late in the Summer to be posting patio makeover projects, but that’s what happens when you mix together family vacations and rainy days. If you can’t use it this year, get a head start for next year!
I really like the look of burlap; it definitely has a place in a Country Chic makeover, so I picked some up at the craft store along with some Outdoor Patio Paint to decorate it. I decided to make the project a little bit more interesting by creating three different pillows–different size, different shape, different patterns, but all coordinating. Find out how to make these pillows for yourself below!
What You Need
- Burlap, tightly woven (I used a roll of a burlap table runner from Michael’s. Don’t forget to use their coupons–you can get these on your mobile phone or print them here.)
- Fabric Scissors
- Polyfill Pillow Form, find the outdoor approved variety if you plan to leave these out in the rain (Purchase one online here—affiliate link.)
- Outdoor Patio Paint (or Acrylic Paint if these will not be left outside in the rain)
- FrogTape Painter’s Tape, Shape Tape
- FrogTape Painter’s Tape, Delicate Surface Tape
- Sponge Brushes
- Cardstock
- X acto knife
- Cardboard or newspaper to cover work surface
- Sturdy thread to match the burlap
- Pins
- Sewing machine, make sure you are using a needle for heavy materials
- Hand sewing needle for finishing
 What to Do
 What to Do
1. Using your fabric scissors, cut out two pieces of burlap for each pillow. Measurements will differ as you may use different sizes than I did. You will want to leave enough room for stitching.
2. Place one of the sides down, the one you are going to paint, on your covered surface. I used a large piece of cardboard. Now you can start taping. For pillow #1 I used the Chevron tape. Lay down the tape, paint in between, then peel the tape away.
![]()
3. When you are done painting, let the paint dry completely.
![]()
4. For painting the lemons and leaves in pillow #2, you will need the Delicate Surface tape. Draw half of the lemon and leaves (or whatever you are designing) onto the tape.

5. Now tape the drawn-on section onto the top of the roll, overlapping just slightly. Do small sections at a time. Draw the other half of each design on the tape roll. Cut the designs out and you are ready to stick them to the burlap.

6. Using a foam brush, dab white paint around the edges of your tape designs.

\
7. Peel away the tape and you can re-use it again and again until it will not stick enough to paint around.
8. Once you have all the designs painted on around the outside, you can fill in the inside of the lemons with yellow paint. I dabbed the paint on sparingly with the foam brush to make it look textured and imperfect, but you can use a regular brush to fill it in more completely if you choose. Get creative, these are just guidelines!

9. Dip the circular, wooden end of one of the foam brushes into some blue paint and press onto the burlap here and there to make blueberries (see picture at the top of the post.) Again, let the paint dry completely when you are done.

10. For pillow #3, the monogrammed pillow, you will again add some designs around the outside using the tape as we did for the last pillow. Add some more blueberries as well just like above.

11. Make a monogram with the letters of your choice. We chose JDA for our initials. You can draw this yourself on a sheet of paper in the size you would like or create it online using a design program. If you don’t have either, there are free monogram generators online where you can create a monogram. Put the picture into a Word document, format the page to landscape, and make the picture as big as you need for your pillow (keep in mind print margins!) Print the picture on a piece of cardstock.

12. On an open area of cardboard (or on a cutting board if you only have newspaper underneath your painting area), carefully cut the monogram out of the center of the cardstock using an X acto knife. You will be using the white outside of the paper and the white inside areas as you will be making a stencil (see picture below.) Tape the outside piece of cardstock onto the burlap where you want the monogram to be.
13. Place a few pieces of Delicate Surface tape next to each other on your hard cutting surface; make sure it is a surface that the tape will peel off of easily (i.e. not newspaper.) Carefully cut the inside pieces from the monogrammed letters and trace each onto the tape, right side up.

14. Using the X acto knife, cut the traced pieces from the tape and place in their respective positions on the burlap inside the piece of cardstock. You can either use the monogram cutout of the cardstock or from the picture on the computer for reference.

15. Use another foam brush to dab paint onto the burlap in the middle of the monogram. You will want to dab as a brushing motion will not leave as clean of lines in this case or could pull the tape up. Add paint until the color is solid. When you are finished painting, remove the tape and paper and let dry completely.

16. Once all your paintings are dry, you are ready to get sewing. Make sure you have the proper needle attached and thread strung through correctly according to your particular sewing machine (I am sure you already know this, but it has to be said.)
17. Before you start stitching, you need to prepare the pillows. Pair each of the pieces of fabric with their respective fabric pieces, two per pillow (a front and a back) and turn them “inside out” so that the painting is on the inside. This is important because you don’t want your stitching to show so you will later be turning the piece right-side out.

18. Pin the two pieces of burlap together so that everything stays in place when you are ready to sew. You can pin any way you like, but I like to pin intersecting with the fabric edge rather than parallel with it so that I don’t accidentally get pricked or the needle accidentally hits the pin and breaks.

19. Now you can begin sewing. I would just use a regular setting on the sewing machine unless you know the machine well, then adjust as you see fit. Begin a little way in on the bottom and about an inch away from the edge of the fabric. You can also do what I do and line up the edge of the sewing foot with the edge of the material as a guideline. Sew a few stitches then hit the reverse button and sew a few stitches backwards for a good hold. I do this at the beginning and the end of my sewing. *Note, you will be needing to leave a large enough hole on the pillow to insert your pillow form and hand-stitch shut. I would recommend leaving this space on the bottom so your hand-stitched section is less-noticeable, and in the center of the fabric rather than a corner as this is easier to sew shut neatly.

20. Keep sewing around the edges of the fabric. When you get to the corners, lower the needle into the fabric then lift the foot. This allows you to turn the fabric easily and keep going. Once your fabric is turned and your foot is facing the right direction, continue sewing. Sew all the way around until you have as much room as you need to stuff in the pillow form. I leave about enough for my hand to fit inside. Be sure to hit the “reverse” button at the end again and sew a couple more stitches backwards to lock the stitching into place.
21. Cut off all of the dangling thread left on from sewing so it looks nice and neat. At this point I used my fabric scissors to trim off some of the excess fabric along the edges where it may have frayed or not matched up. I also cut notches into the corners just to help the thick fabric turn back right-side out properly without having clumpy corners.

22. Turn the pillow case right-side out so that the painted side is up. Be sure to finish off the corners, either by carefully sticking a pen or something similar inside into the corners to push out or by pulling out with a needle if you feel comfortable doing that.
23. Stuff the pillow form into the case making sure it fills in the corners and that it is inserted correctly.

24. Now you can hand-stitch your pillowcase shut. If you need instructions on how to sew a blind stitch, you can find instructions online. Click here to find videos and directions from Instructables. Once your pillows are sealed and your threads are trimmed, you’re finished! Enjoy those lovely pillows and share your pictures on our Facebook timeline!

We’re getting All Decked Out! Be sure to check back in for DIY projects and the reveal of my patio makeover!
Know someone who could use this? Hit the “share” buttons below! Be sure to follow Arts & Crackers on social media (buttons at the top right of the page.)
-What designs will you paint on your pillows?


ooh, very pretty! And great idea -I didn’t know outdoor paint existed, I’m always looking for something else to use my stamps on, may have to try this! Thanks!
Thank you so much! Yes, I purchased these at Michael’s near the terracotta pots! I’d never seen them before either.
These came out wonderful, and I love your detailed instructions – much less likely to get the wrong thing, or goof. I haven’t used burlap in ages, but I love to make pillows and never thought to use burlap – I’d like to try this1
Thanks so much, Rosie! If you do try them, feel free to share pics!