

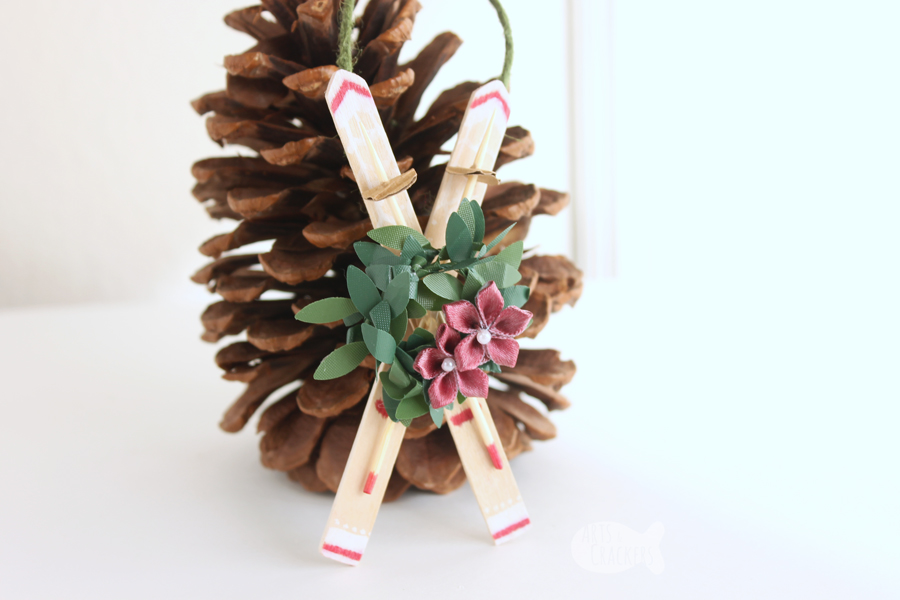
Homemade ornaments are some of my favorite ornaments. The last several years we’ve been doing a “family tree” that has fun colored lights, flickering candle lights, and loads of homemade and sentimental ornaments. This year we decided to make ornaments that looked a little old-fashioned and fit my country look–and I love how these DIY Craft Stick Snow Ski Ornaments came out.


This post contains affiliate links. By purchasing through these links, you help support the family behind Arts & Crackers at no added cost to you! Thank you!
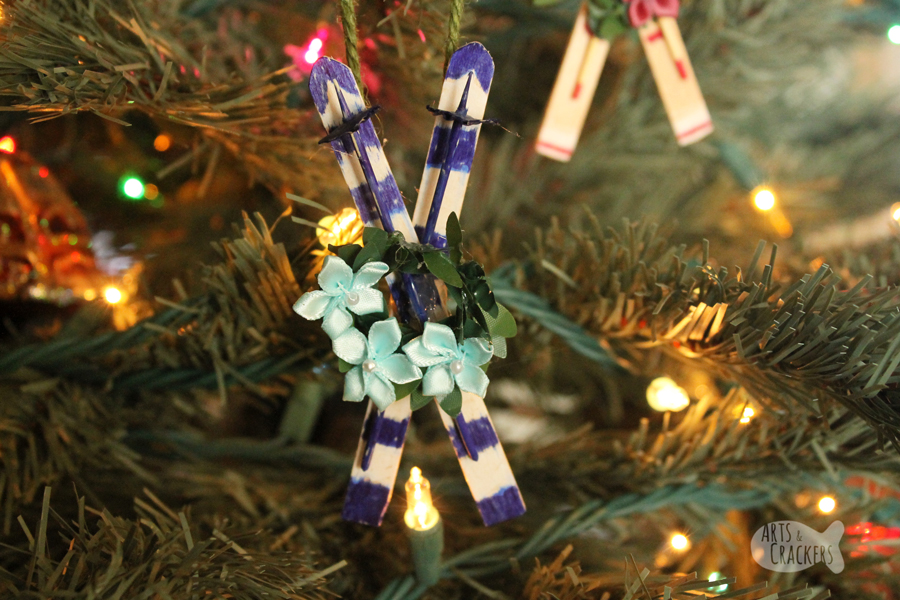
Craft Stick Snow Ski Ornaments can be made as a grown-up craft and are easy enough that they work as a kid-made craft too. The boys each made one after me (with my help, of course) and they love their ornaments. Be sure to write the date and their name on the back of theirs so you remember when they made it (oops…I need to go do that myself!).

You’ll love this Rustic Frosted Frames Winter Decor Tutorial!
I love craft stick projects. It’s amazing how many different things you can do with them; craft sticks are so versatile! I was inspired by this adorable Rustic Wooden Sled Ornament from my fellow blogger at Fireflies and Mudpies. I love how rustic it is and how it incorporates a fun winter activity.
Growing up, I received snow skiing lessons and it was challenging, but so much fun. I love rustic snow skis as decor (perhaps because of the memories), and when I saw the rustic sled turned into a beautiful ornament, I knew skis would make a gorgeous ornament too.
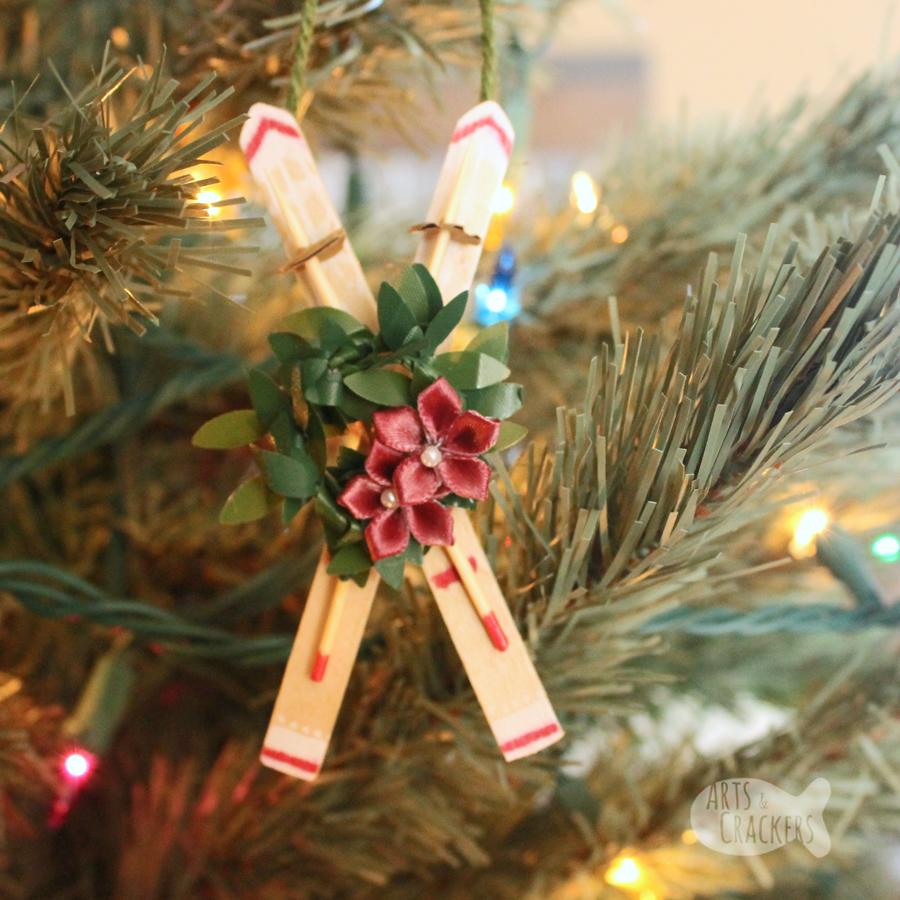
DIY Craft Stick Snow Ski Ornament Adult or Kid-Made Craft
What you need:

Directions
Using the nail file or sand paper, sand off one end of each craft stick so they each have a rounded tip like snow skis. If you are making this with the kids, you may need to help them with this part. Using a pencil or thin marker to draw a line for the shape you want it to make may help.

On the other end of the craft sticks, careful and slowly cut the curved edge off so the stick is flat, then sand the edges a little so they aren’t so sharp.
Note: Do not try to cut quickly. Instead, do a bunch of short cuts or you may crack the wood. If you have any fancy tools to cut this straight with ease, feel free to use those. I just stuck with scissors since it’s a small craft.

Decorate the craft stick skis. I just used markers and a white paint pen to make it simple for the kids to help and to avoid a long dry time, but paint or paint pens would look great! The marker may bleed a bit, so be wary of this. If you have the time and ability, I highly recommend paint or paint pens so it looks extra beautiful.
I drew on places for boots to connect, but this isn’t necessary. The kids didn’t do this.
Next make the poles using the toothpicks. Cut off one end of each toothpick to make it flat. Sand the end if needed to make it flat and smooth. If you wish, color or paint the flat end of the ski pole. If you order the ones I linked to above, they should already have a flat end so you can skip this step.
Cut circles from the corrugated paper/cardboard.
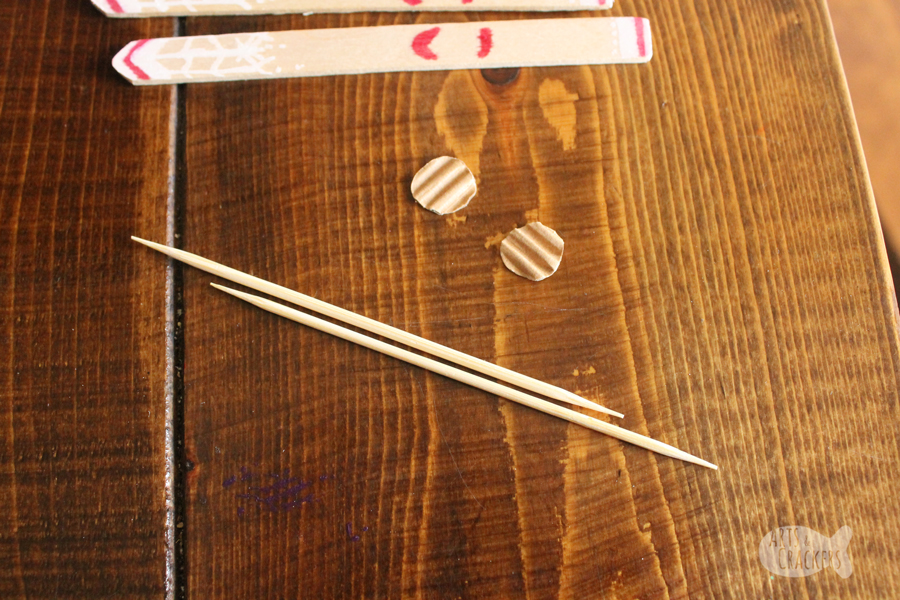
Carefully slide one circle paper piece onto the pointy end of each ski pole until it is stuck in place. You shouldn’t need any glue, but if you feel like you need some, just add a dab.
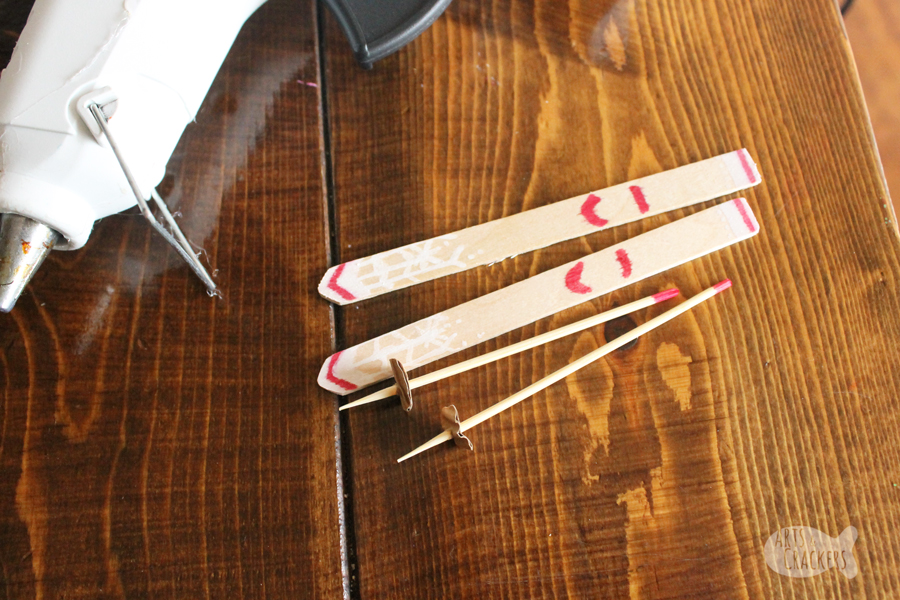
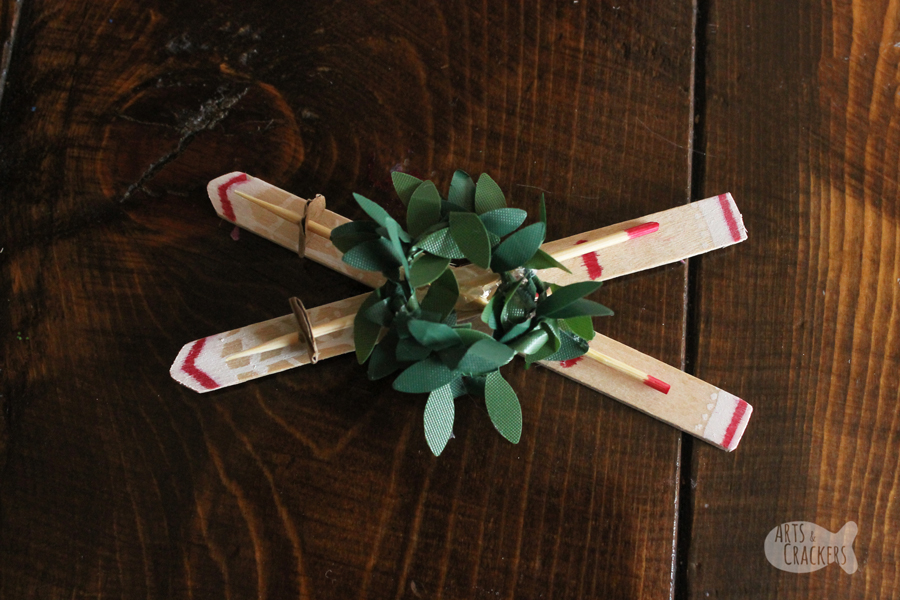
Use hot glue to glue the two ski sticks together, slightly angled. Decide which you want on the bottom and which you want on the top.

Decide which ski pole you want on top and which you want on bottom. First, glue the one you want on the bottom. This one should be the same angle as the ski that is on the bottom so everything sits properly. Then glue on the one that belongs on the top.

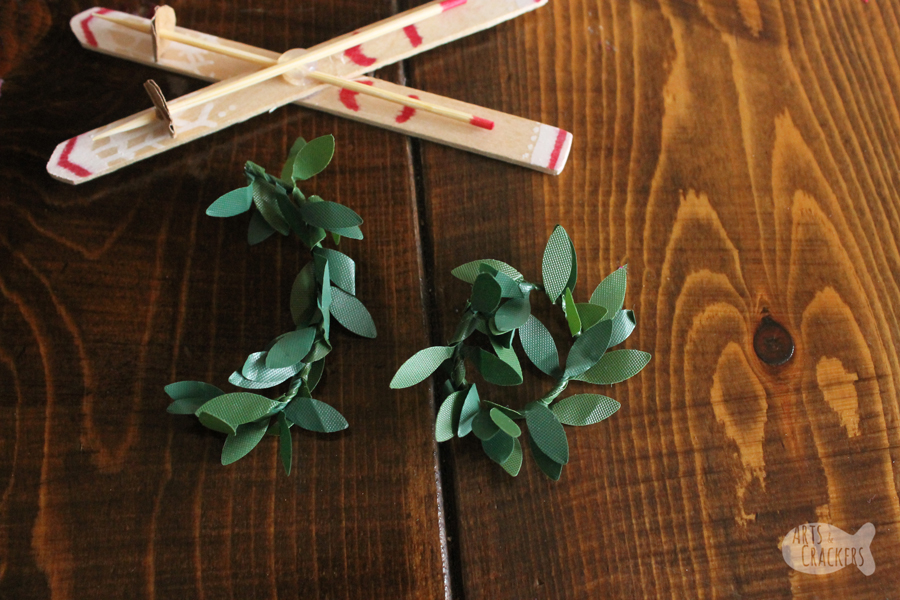
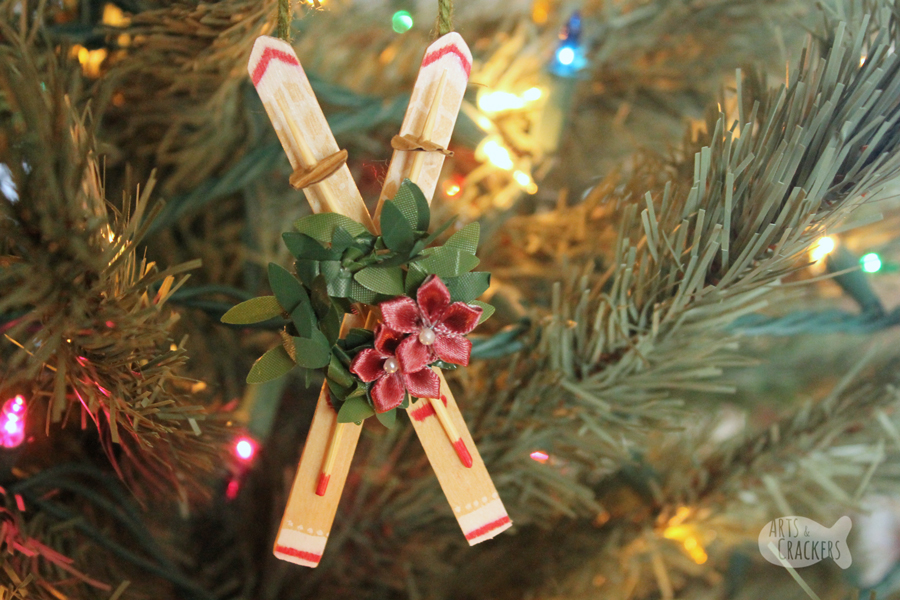
Make a beautiful wreath for the center of the ornament using tiny garland. I cut two small strands then intertwined them and glued them together to make one thicker wreath. Glue the wreath onto the center of the skis.
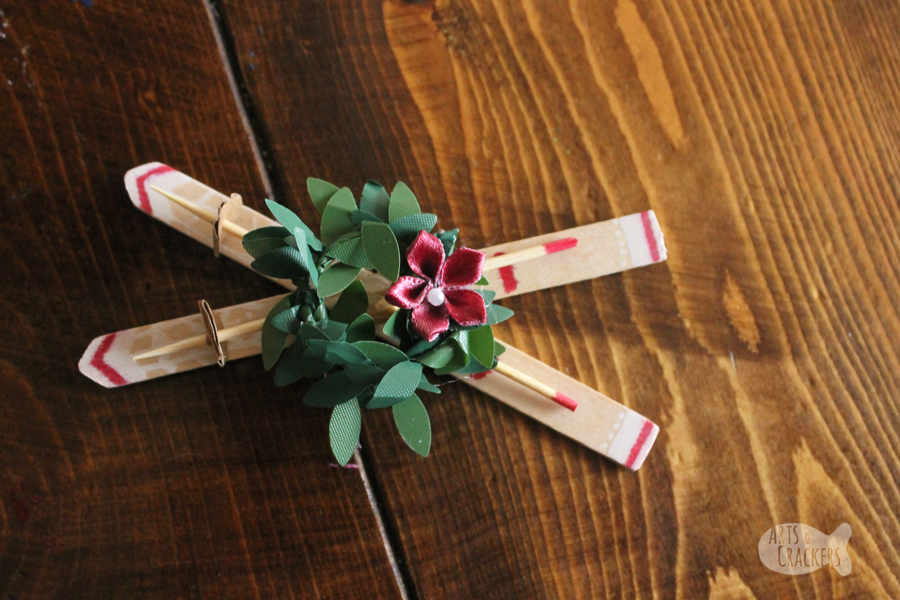
Now glue on some decorations. I had some tiny fabric flowers in my craft supplies. They were blue, so I used a marker to color them so they would look more like poinsettias. My boys left theirs blue.
Glue the flowers on wherever you want to. I glued mine close together on the wreath. E glued his more spread out. S glued his on the wreath and the actual skis.
Since we used hot glue, I just asked the boys where they wanted things, put a dab of hot glue, then let them carefully set the item on top. If it needed to be repositioned better, I helped so they didn’t burn their fingers.
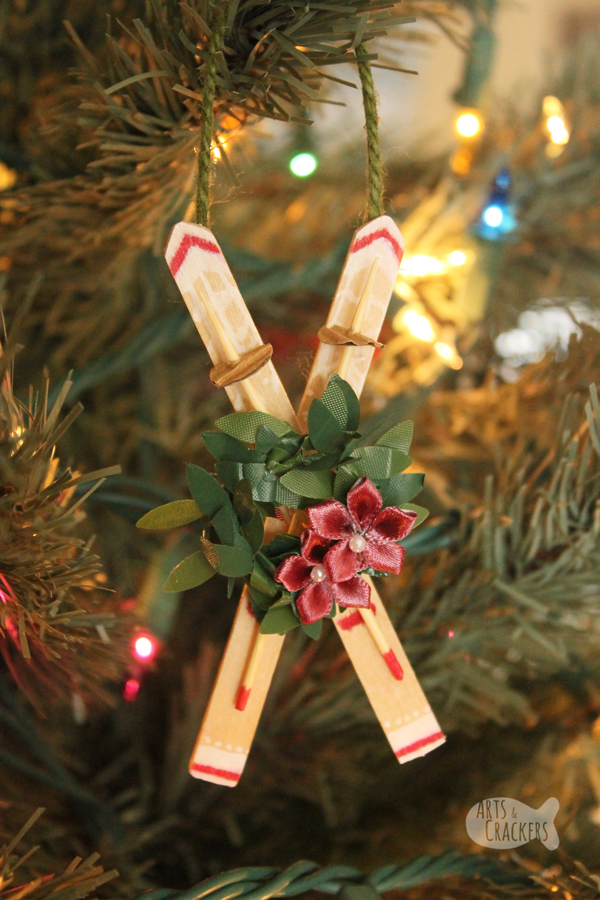
Once the glue has all dried, glue the yarn on the back in a loop shape. You may need to glue the string towards the top of the skis too so it hangs straight. Do not turn the ornament over until the glue has dried fully.

Hang your Snow Ski Ornament on the tree and enjoy its beauty!
Didn’t my boys do a great job?!


Read also: Handprint Holly Ornament and Handprint Family Christmas Tree Craft
Looking for more? View these categories!


Your ornaments are really cute. I have homemade ornaments on my tree dating back to 1970 and from three generations. Moms, grandmas and great grandmas cherish homemade ornaments. I especially treasure those that incorporate a picture of the maker.
.
Thank you 🙂 Yes, they do. We are working more of those into our craft planning.
Pingback: DIY Christmas Ornaments for Everyone | Life on the Loop
Pingback: Cheap Last Minute DIY Christmas Decorations Easy to Make Yourself
Pingback: DIY Christmas Craft Advent Calendar for Kids | Countdown to Christmas
Pingback: 103 Best DIY Christmas Popsicle Stick Crafts For Kids - Our Ultimate List - Mom Money Kids
Pingback: DIY Flamingo Candy Cane Craft | Unconventional Christmas Decor