

Let me tell you a little secret. Sometimes I get a little stingy when I am making crafts–spending time, spending money…I love making things that are really quick, really cheap, a little quirky, and don’t require a lot of skill. Honestly, I didn’t even bother putting up our Christmas tree this year because it was too much work. That’s when I had the idea for this DIY No-Sew Yarn Christmas Tree holiday home decor (you don’t even need glue!).


If you’ve snooped around my site or are an avid reader (shout out to all my readers and supporters–thank you!), then you probably already know that I do a ton of crafts. Often they are somewhat simple and frequently quirky, but I haven’t shared a ton of grown-up crafts that are just so easy they only take a few minutes to make.
Well, except my No-Sew, No-Knit Yarn Snowman (I decided I’d do a “lazy yarn craft series” so I have some others in mind too!).

This Christmas I have been crafting up a storm. Snacks and wall decor and snowmen and wrapping paper trees…but I was missing something. Then it hit me.
I’d make a yarn Christmas tree.

But…I didn’t want to take much time with it. I wanted something easy. I pictured a skein of yarn on a post and it all started there.
Initially I’d planned to glue on some decorations, but I decided this should be so simple that it doesn’t even require glue (and you can take it apart to reuse the craft supplies and make it again next year!).
Easy No-Sew DIY Yarn Christmas Tree Holiday Home Decor
Supply List
- Pasta dryer rack/generic vertical paper towel holder/dowel rod glued to a wooden base
- Skein of green yarn
- Small strand of battery-powered Christmas lights
- Bobby pin
- Brad paper fasteners
- Mini tree topper
- Wrapping paper
- Tape
- Ribbon or twine
- Mini wrapped gifts
Directions
1. Find something with a base and a post not too much taller than the yarn skein you’ve chosen and fairly thin. I used a pasta drying rack (I have this one) without the thin skewers through the top. A standard vertical paper towel holder or a dowel rod glued to a wooden base should work for this too.
2. Tuck in any loose strings from the yarn skein.
3. Slide the center of the yarn skein onto the post.

4. Depending on how much room you have, you may need to slide the yarn down a bit so it isn’t too far from the base and there is room at the top for the tree topper.
5. Wrap the Christmas lights around the yarn skein, inserting a bobby pin every so often to hold the string of lights in place. Just open the bobby pin, slide it over the light strand and push it into the yarn.

6. Decorate the yarn Christmas tree. I stuck brad paper fasteners in here and there. You could hang mini ornaments, glue on beads, paint some white to make it look like snow, add a sparkly mini garland…have fun with it. Make it quirky.

7. Wrap the battery pack in wrapping paper. Cut a slit at one end so it wraps around the cord. Tape it up just like you would a normal gift then tie on a pretty ribbon or add a bow on top. Push the on/off switch through the paper so you can still utilize the switch.

8. Add a couple other small gifts wrapped up like the battery pack so it isn’t lonely sitting under the yarn Christmas tree.
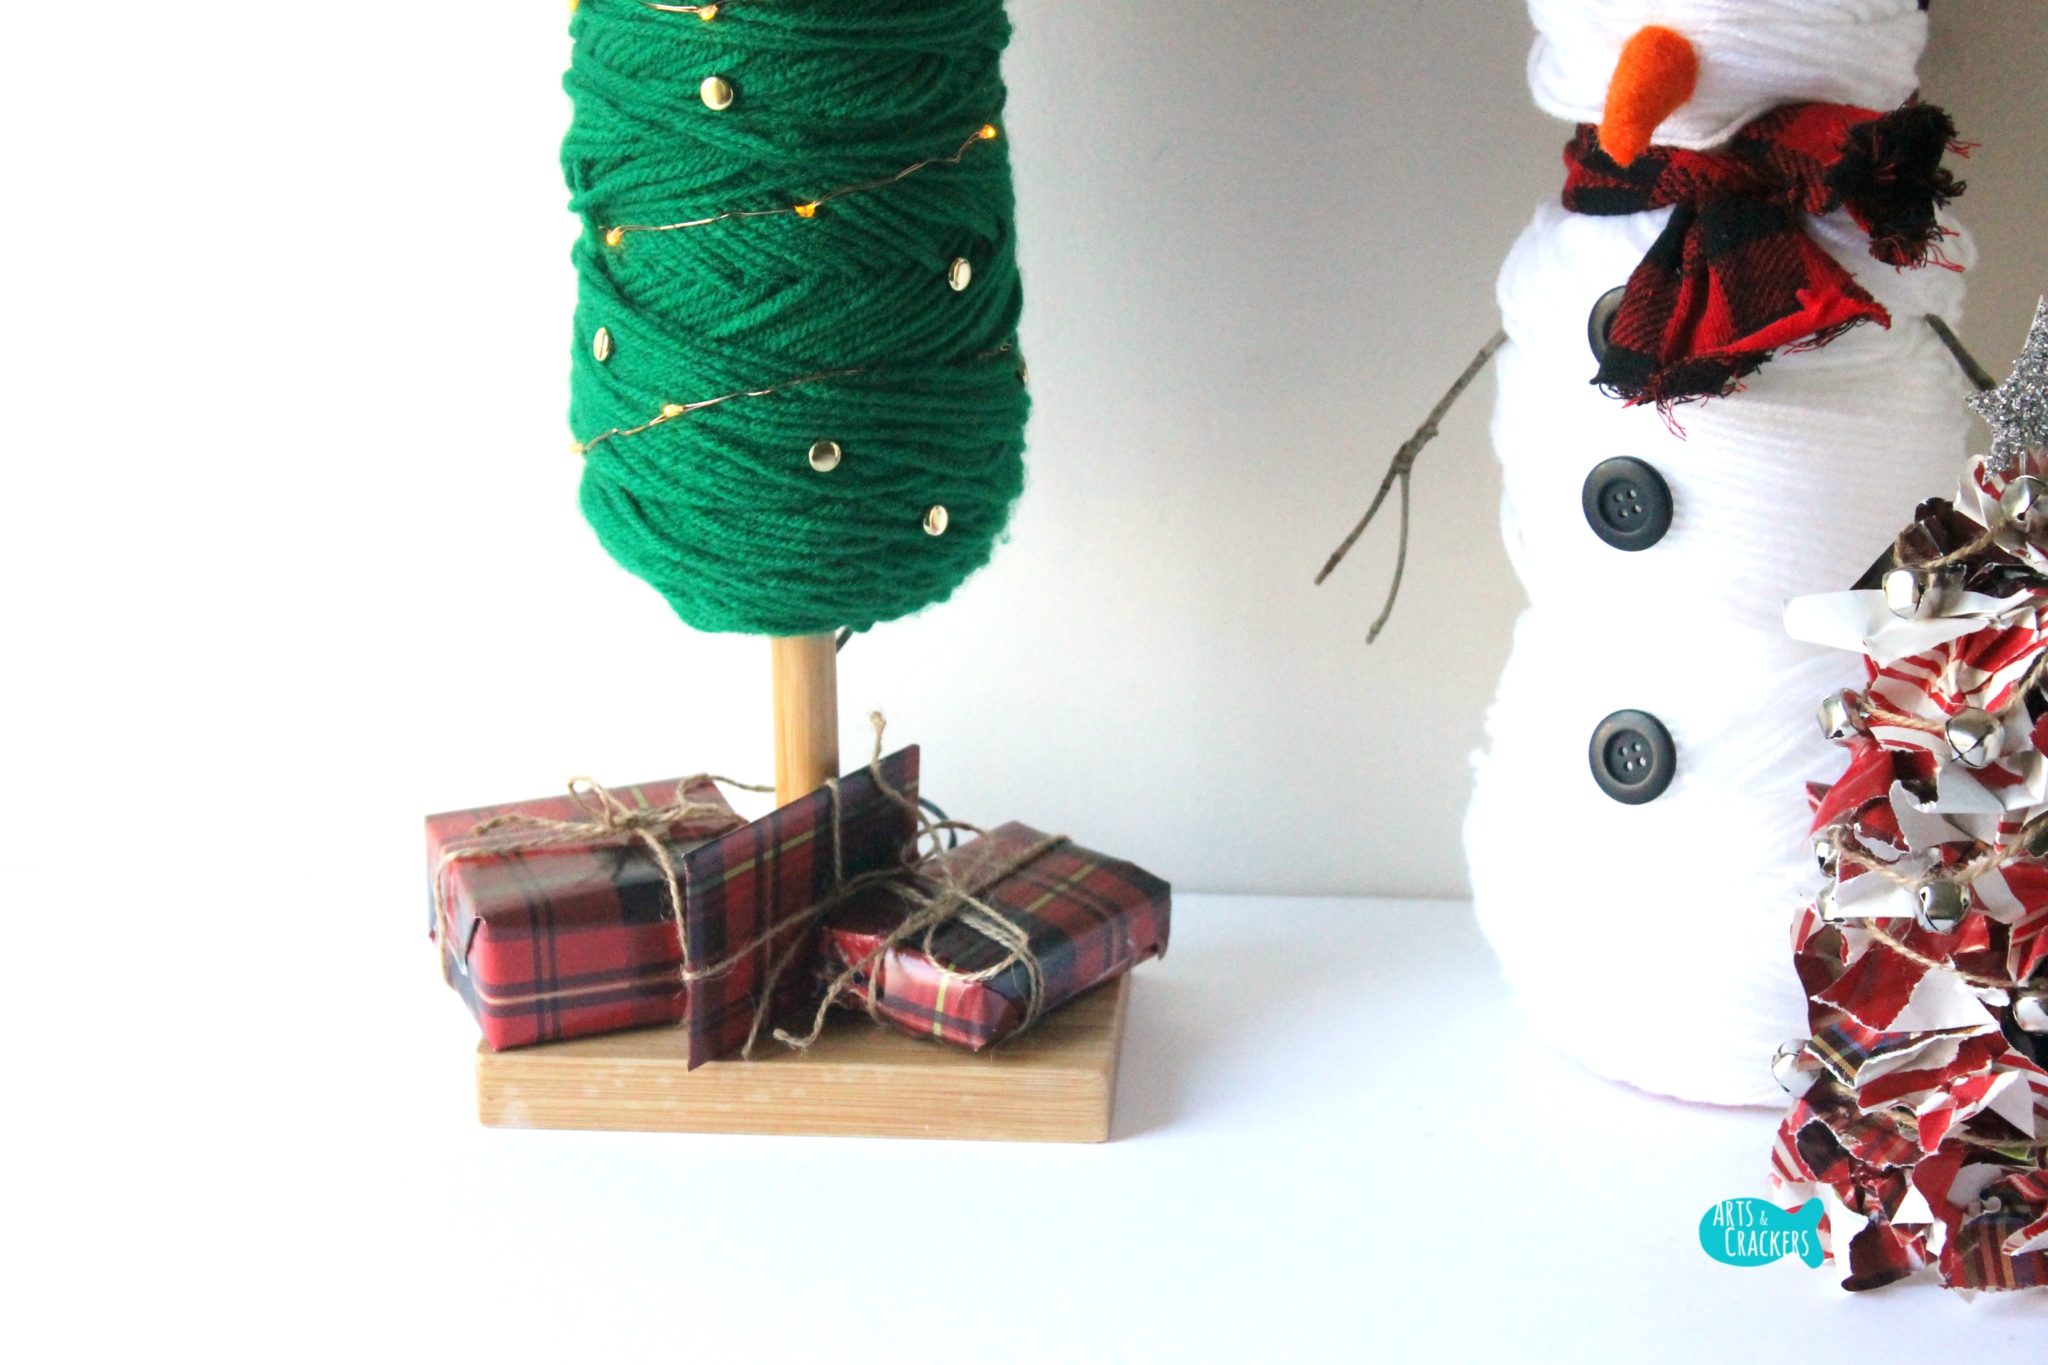
9. Tape the extra cord to the back of the post the tree is standing on so it is hidden from view.

10. To finish it off, top the yarn Christmas tree with a mini tree topper or anything you can find that is cute and fits at the top. I happened to have an extra star topper we weren’t using.

The star topper was silver and didn’t quite match the decorations I planned to use, so I used a gold paint pen and colored the front half of the star gold (this way I can just turn it around if I choose to do silver or funky colors next year.).

Display it anywhere you like, perhaps a shelf or a mantle. I set mine up on a shelf with some of my other favorite craft items…the soda tab flowers my husband made for me while he was in Afghanistan, my Burlap Wall Hanging, my Upcycled Wrapping Paper Christmas Tree, and of course my Easy No-Sew Yarn Snowman.

Will you decorate your tree with bright and funky colors? Rustic decor? Silver and gold? Share with me in the comments!
Read also: FREE Snowy Mountain Country Adult Coloring Page and Simple Spring Wreath Tutorial


This is so cute! I love it!
These ideas are so cute. And I love how easy they are!
Pingback: DIY Flamingo Candy Cane Craft | Unconventional Christmas Decor