

This morning, I was really struggling with what to write. Now that I’ve gotten on a great schedule that allows me to write pretty much every morning, I seem to run out of ideas a lot more quickly (at least ones that have complete thoughts and pictures.)
Hoping to find some inspiration, I started looking through my camera files. I came across this “Tied Together” project that we did for Father’s Day last year and figured it would be the perfect time to share. I know we just concluded Mother’s Day, so it may seem quick to jump into another holiday, but right now is when I usually start my planning.
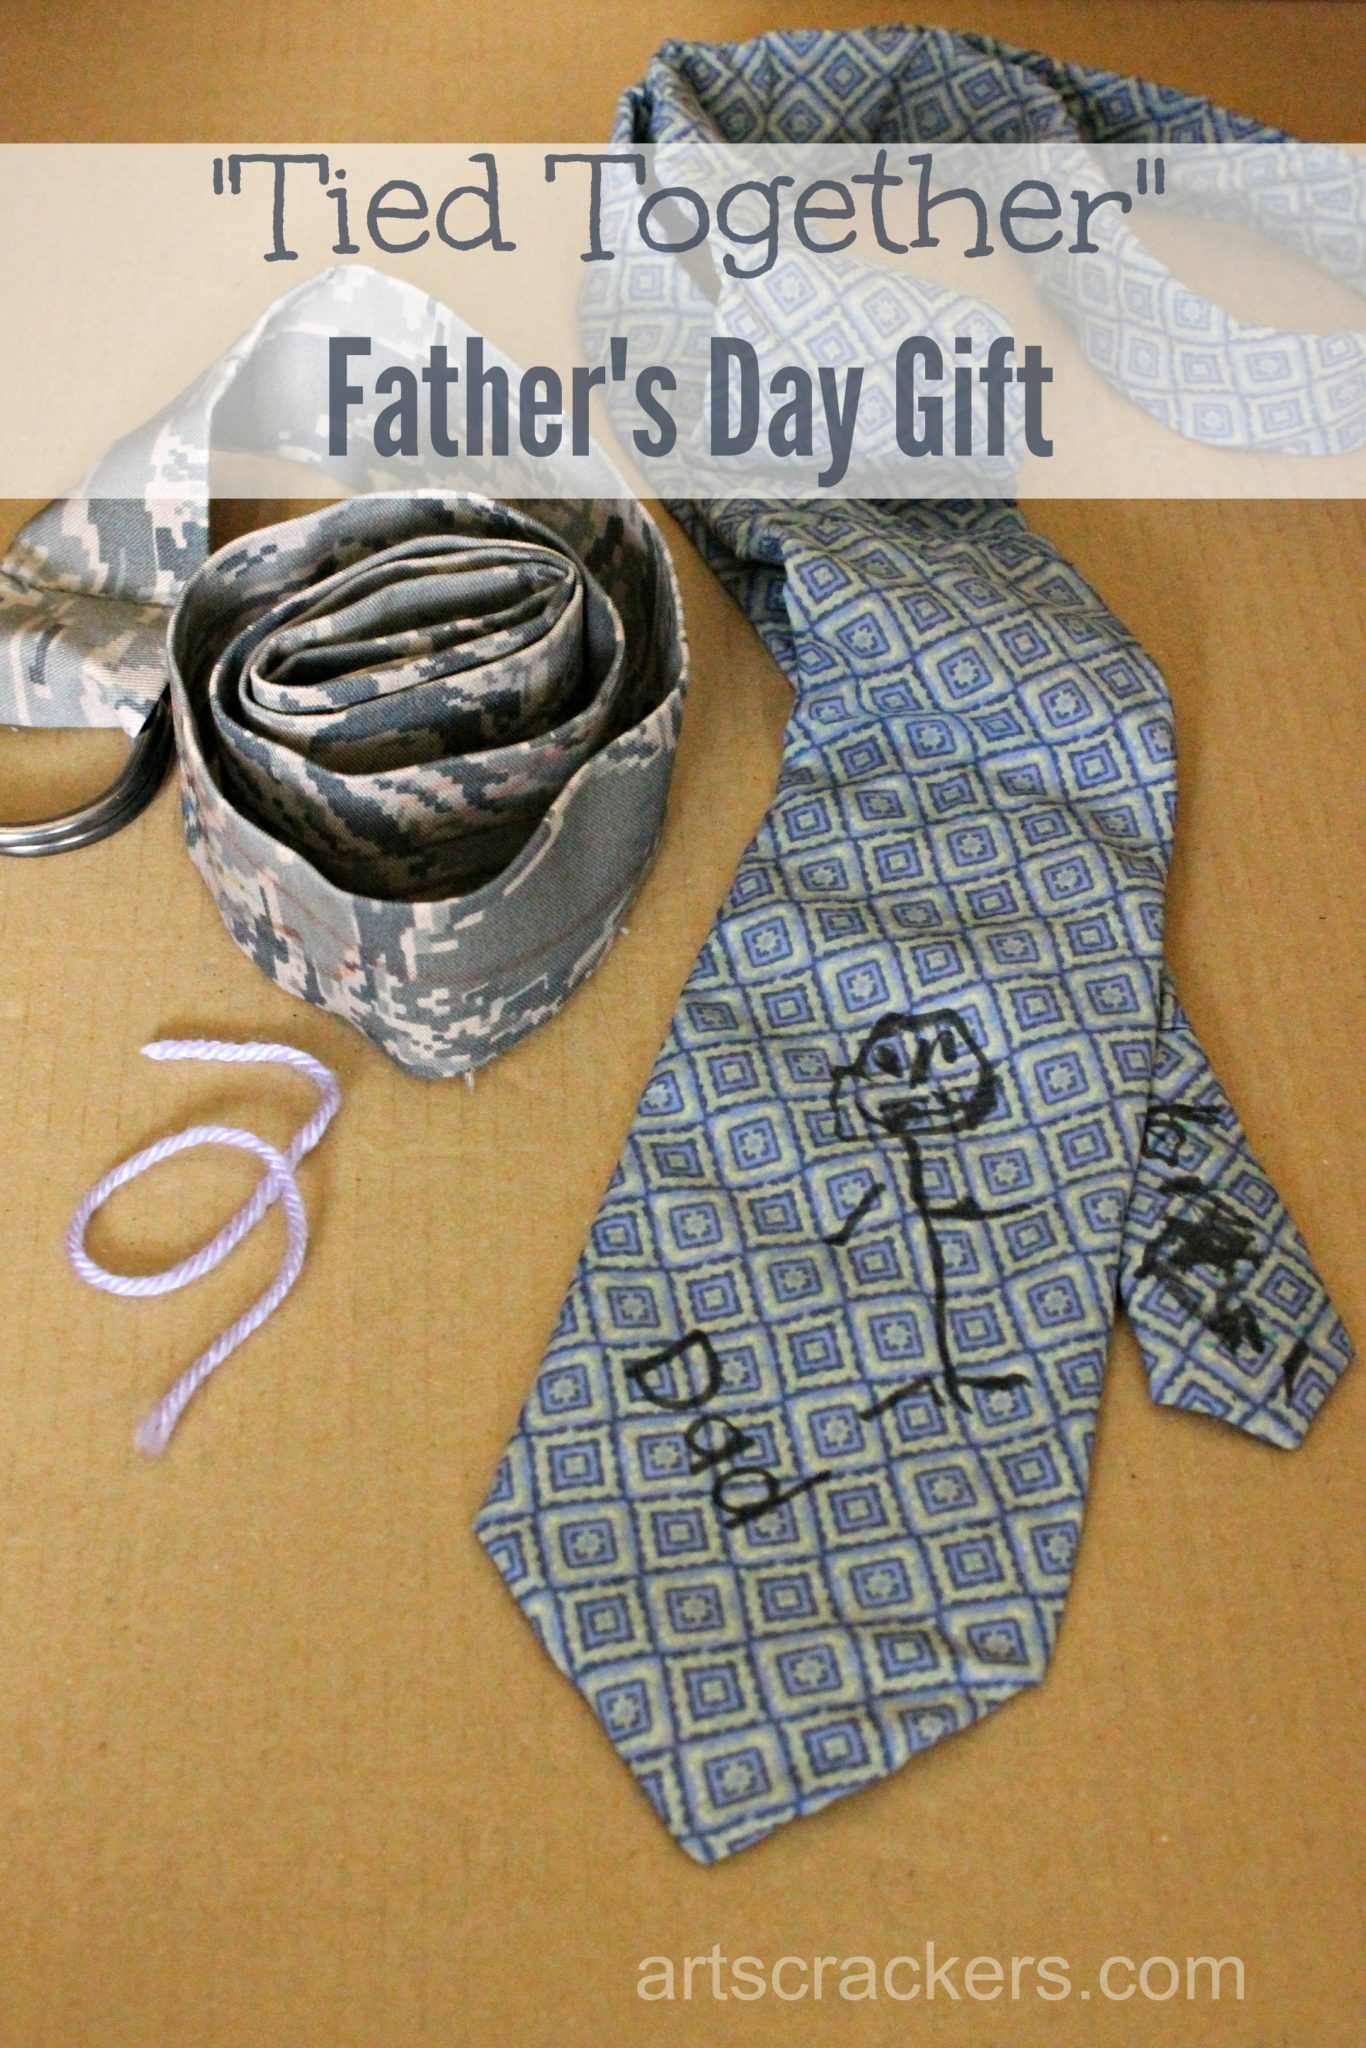
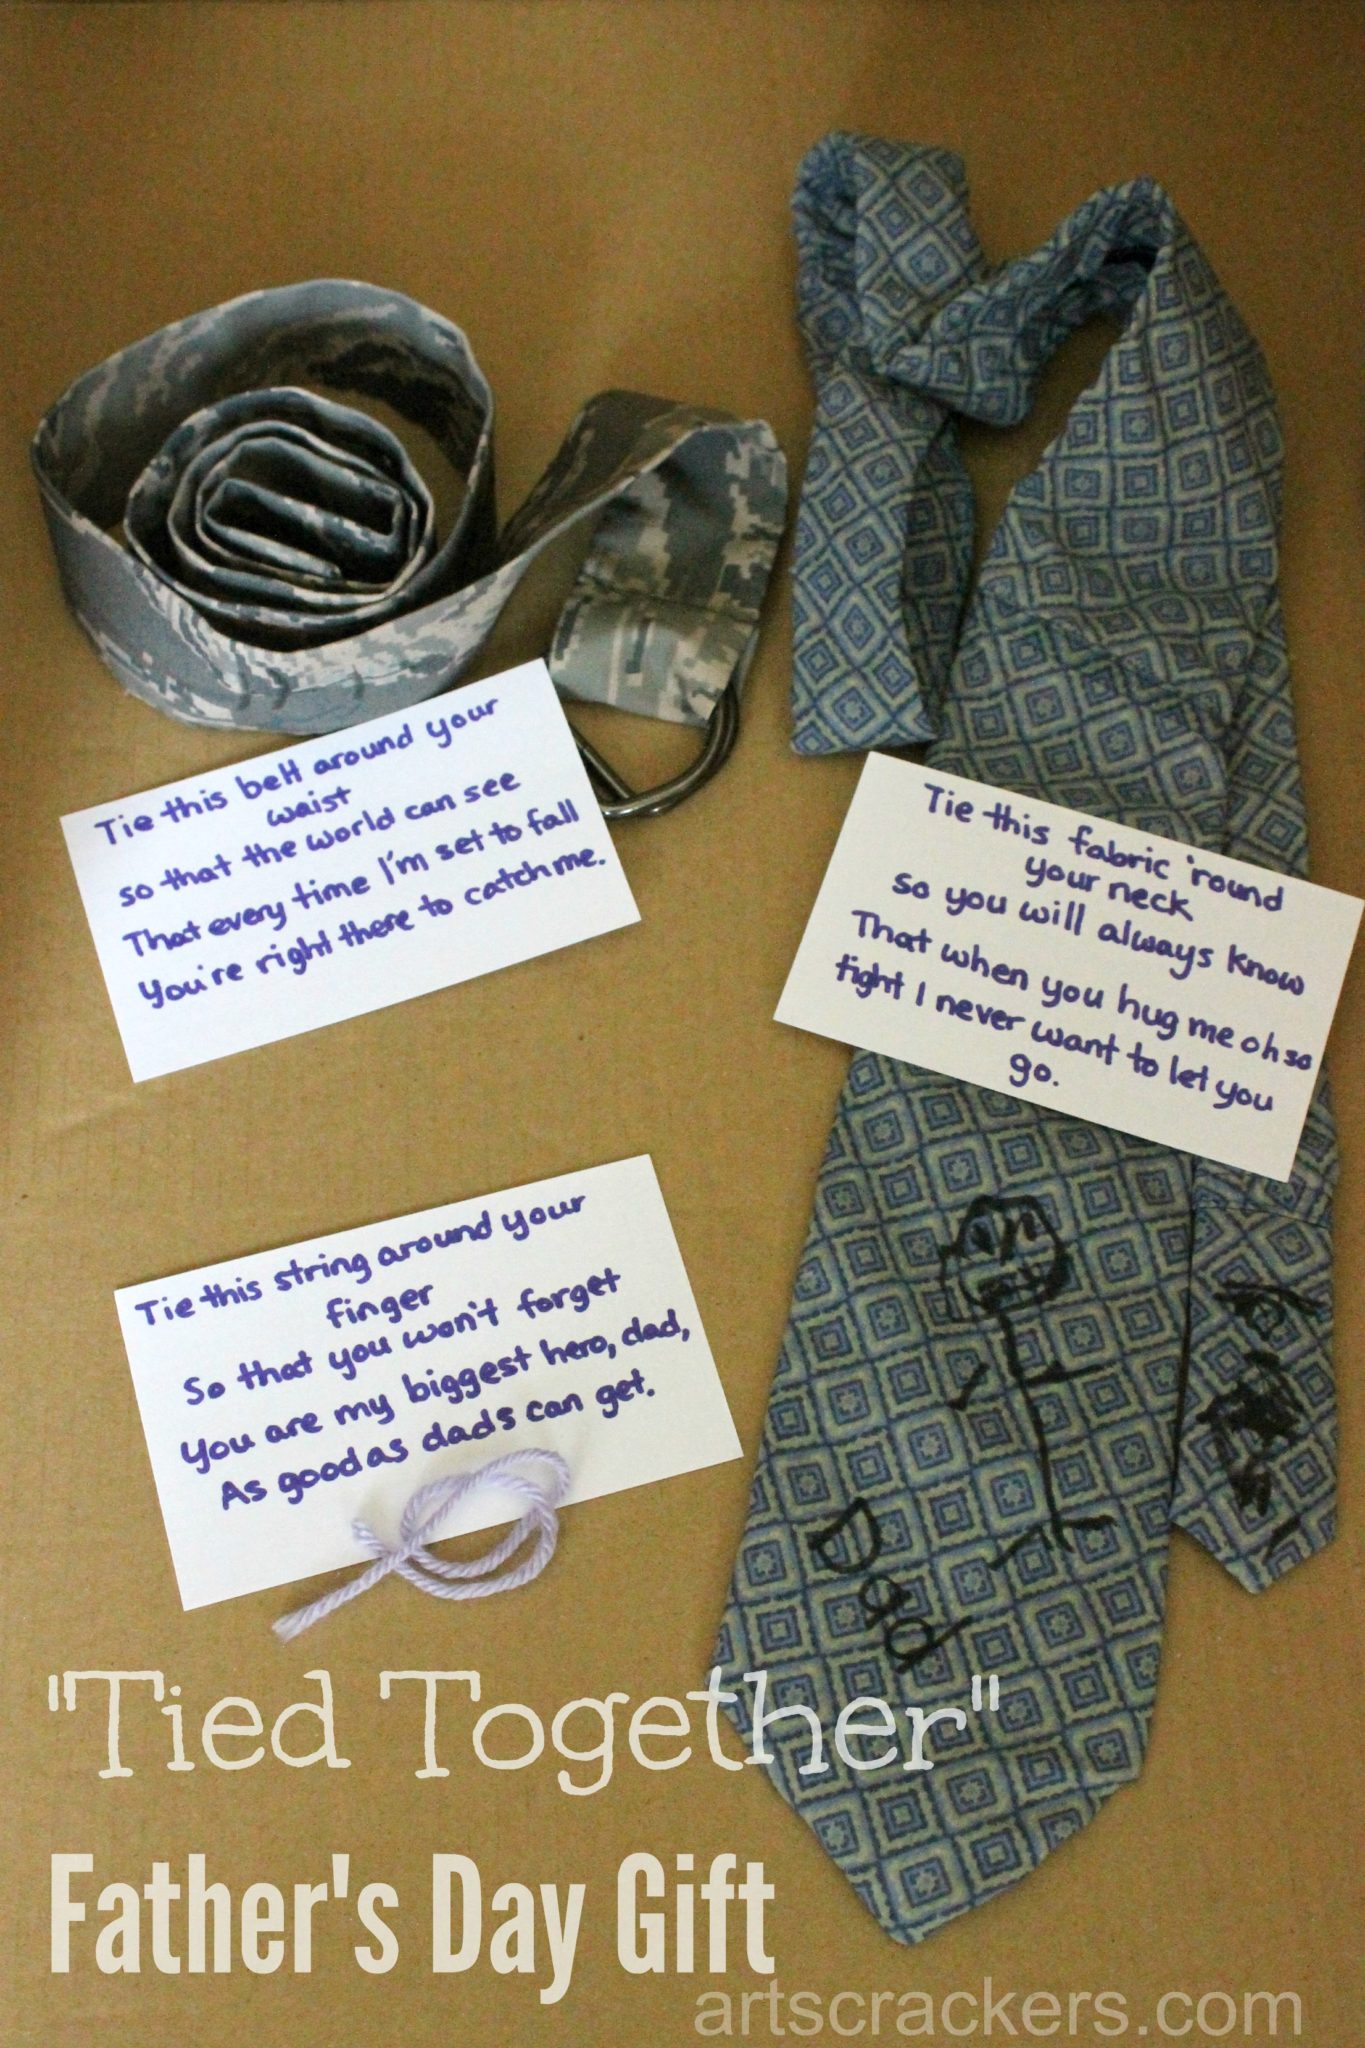
This gift for deserving dads consists of three parts, each that ties in some way: a string, a belt, and a tie. You can use the gift idea itself and purchase all of the products, or you can make them by hand as I did. Below you will find the tutorial to make the tie. We wrapped each gift separately so he could open one at a time.
The String
This is meant to be a reminder that kids look up to their parents for advice and inspiration. For many kids, a parent is their hero. Many will say their hero is their dad. It is easy to take this role with a grain of salt, but it is so important and worth considering daily.
Along with the string we included a card that read:
Tie this string around your finger
So that you won’t forget
You are my biggest hero, Dad,
As good as dads can get.
The Belt
The greatest dads are the ones who support their families and help with their children, whether it’s encouraging them when they fail, building them up to do great things, or setting a good example.
Along with the belt we included a card that read:
Tie this belt around your waist
So that the world can see
That every time I’m set to fall
You’re right there to catch me.
The Tie
Dads sometimes feel unappreciated or unloved, especially if the kids are more in tune with Mom since she is with them more of the day. But, dads need to remember they they too are loved. Kids often do not display love and gratitude the way we as adults would like it, so it is important to be reminded that you are loved.
Along with the tie we included a card that read:
Tie this fabric ’round your neck
So you will always know
That when you hug me oh so tight
I never want to let you go.
DIY Necktie
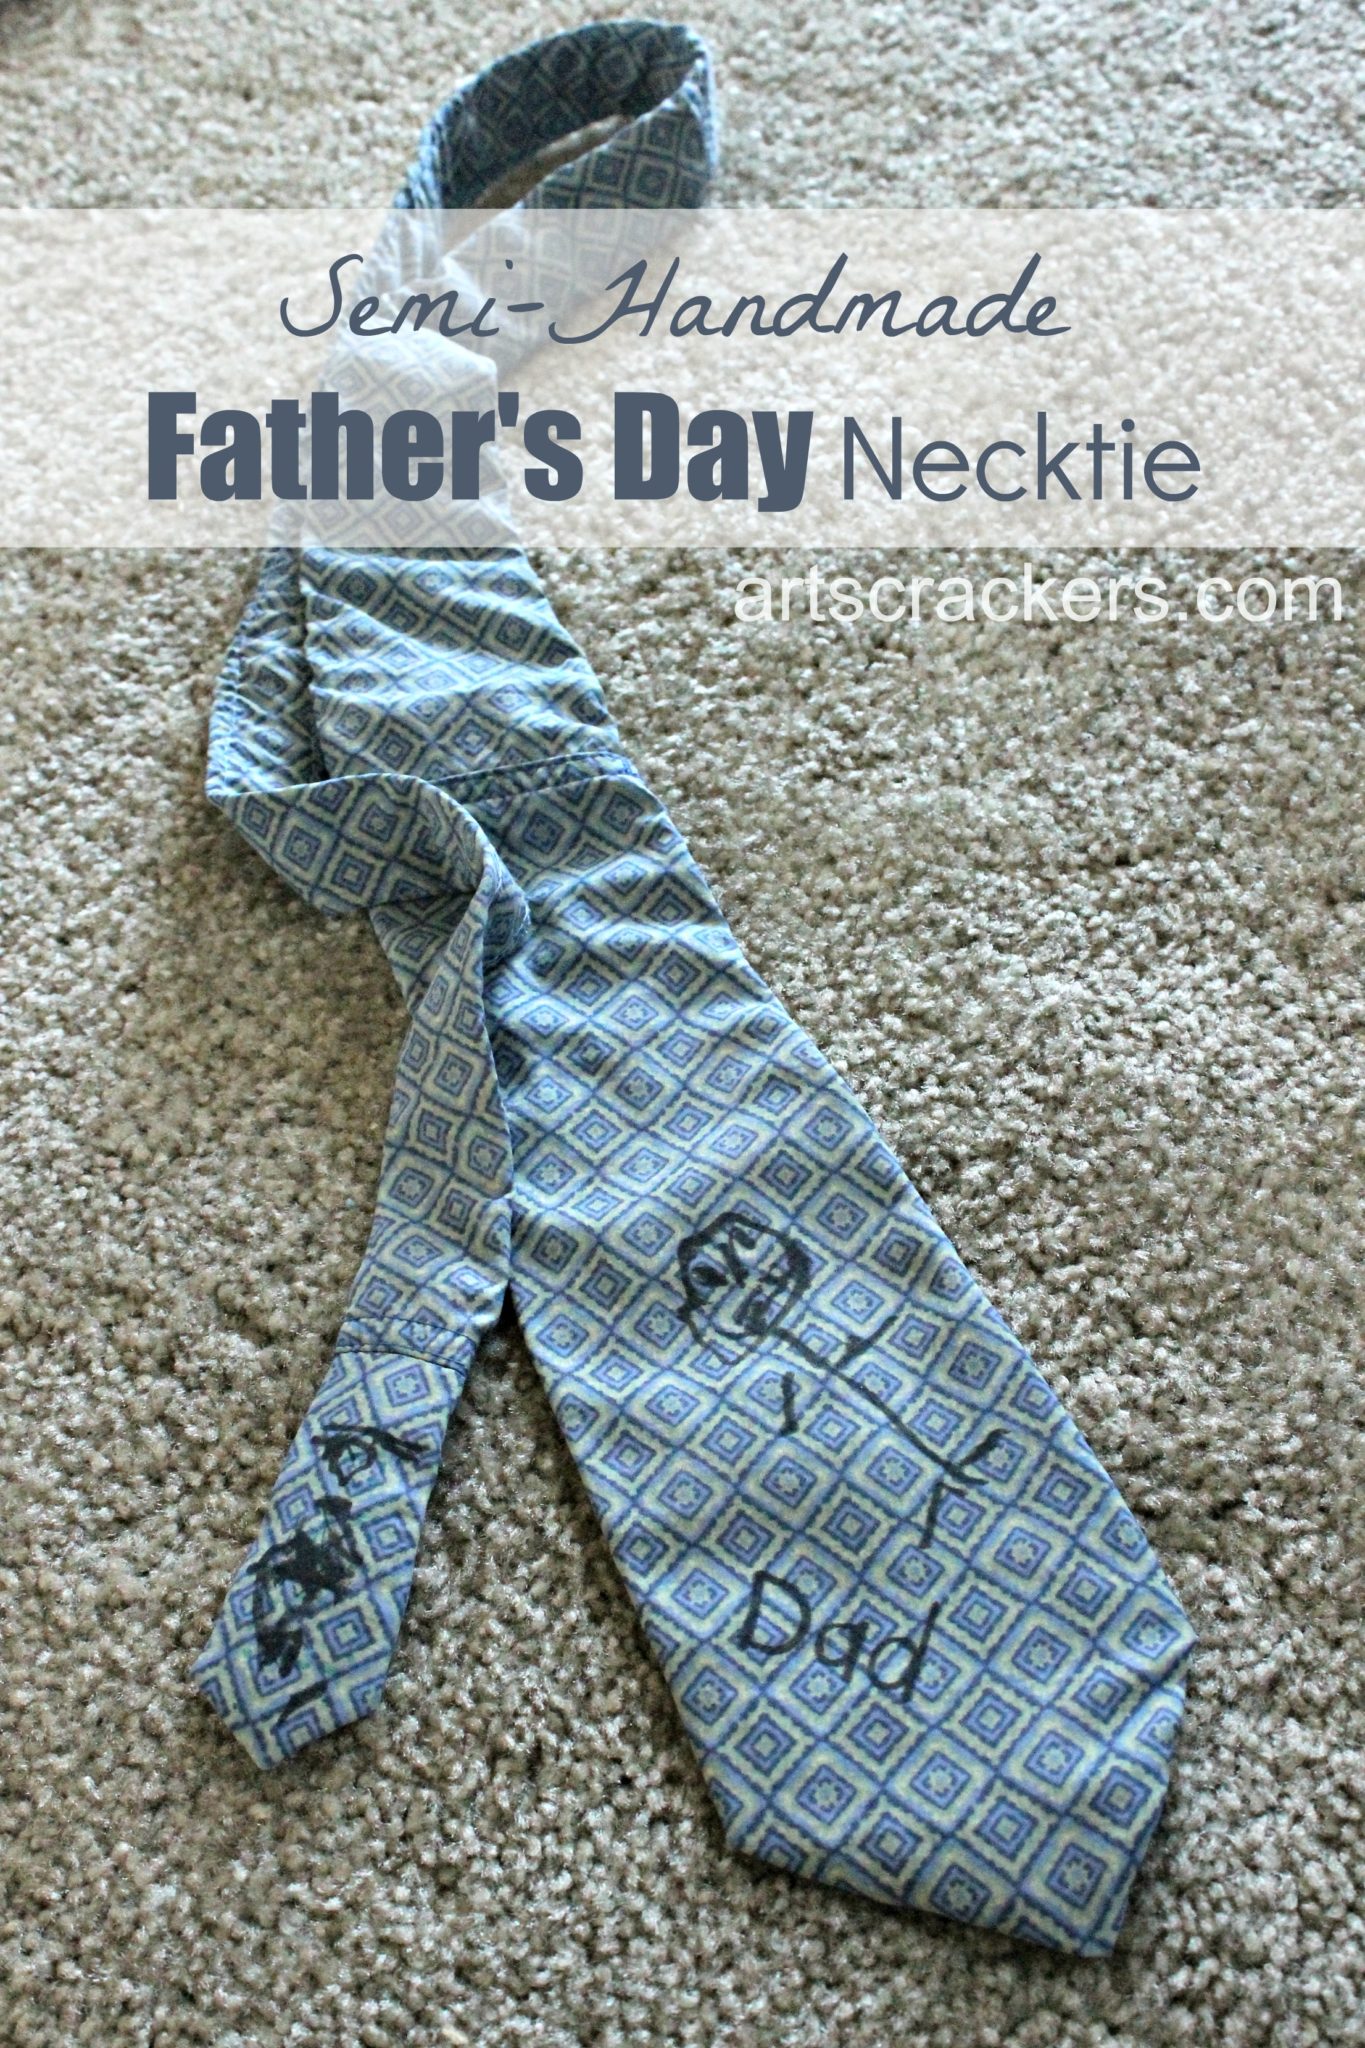
This necktie was a project that I made not only for a Father’s Day gift from our son, but also as a token of my love for our anniversary. The story behind the swim shorts used as material is that they were the ones he wore while we were dating.
I thought they looked silly and he loved them; it was his favorite pair. Eventually they tore, like most clothes do after years of use, so he thought I threw them away. Instead, I washed them and saved them for a future project (which turned out to be this tie.)
You can make this tie many ways, but I’ll share the quick way I did it below. If you are great with patterns and sewing machines and that, feel free to make one entirely from scratch.)
What You Need
- Fabric, pre-washed (something you are able to sew–not too delicate a material–and something of sentimental value is always fun)
- An old necktie
- Sewing pins
- Thread
- Needle
- Light marker or fabric chalk
- Iron
- Fabric markers
Directions
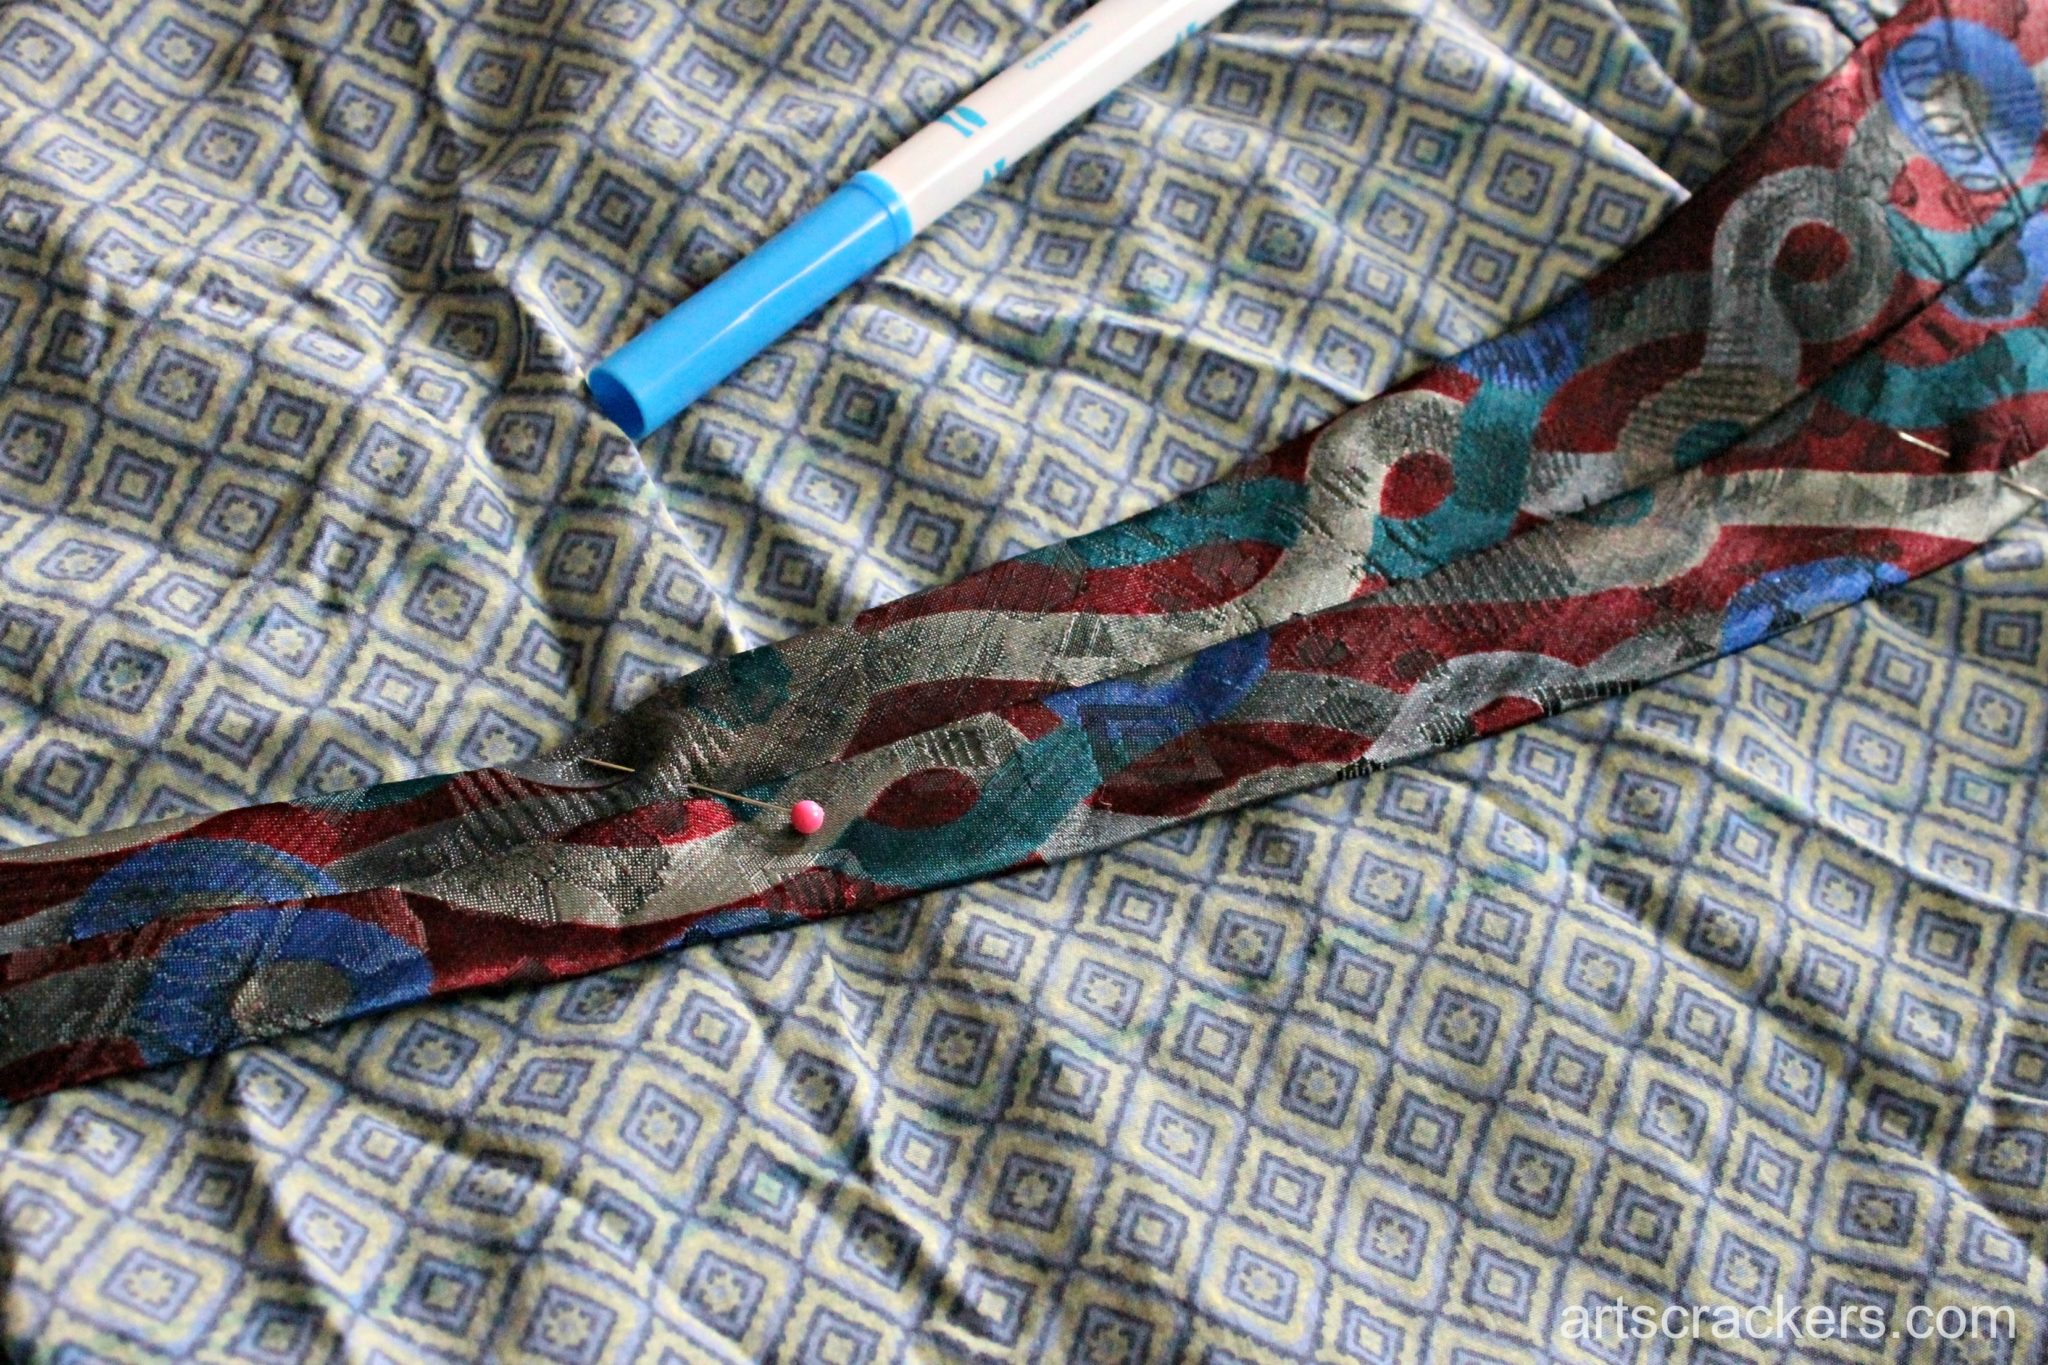
1. First you will want to situate the necktie on the fabric you chose. Find the flattest places. If you are using something like shorts, this can be a challenge with pockets and things, but it is possible. I wrapped the tie around them on all the flat areas. Make sure no parts are overlapping and that you leave a generous amount of space between each part for cutting overlap.

2. Pin the tie down in place. Make sure you use enough pins so that no parts slide around.
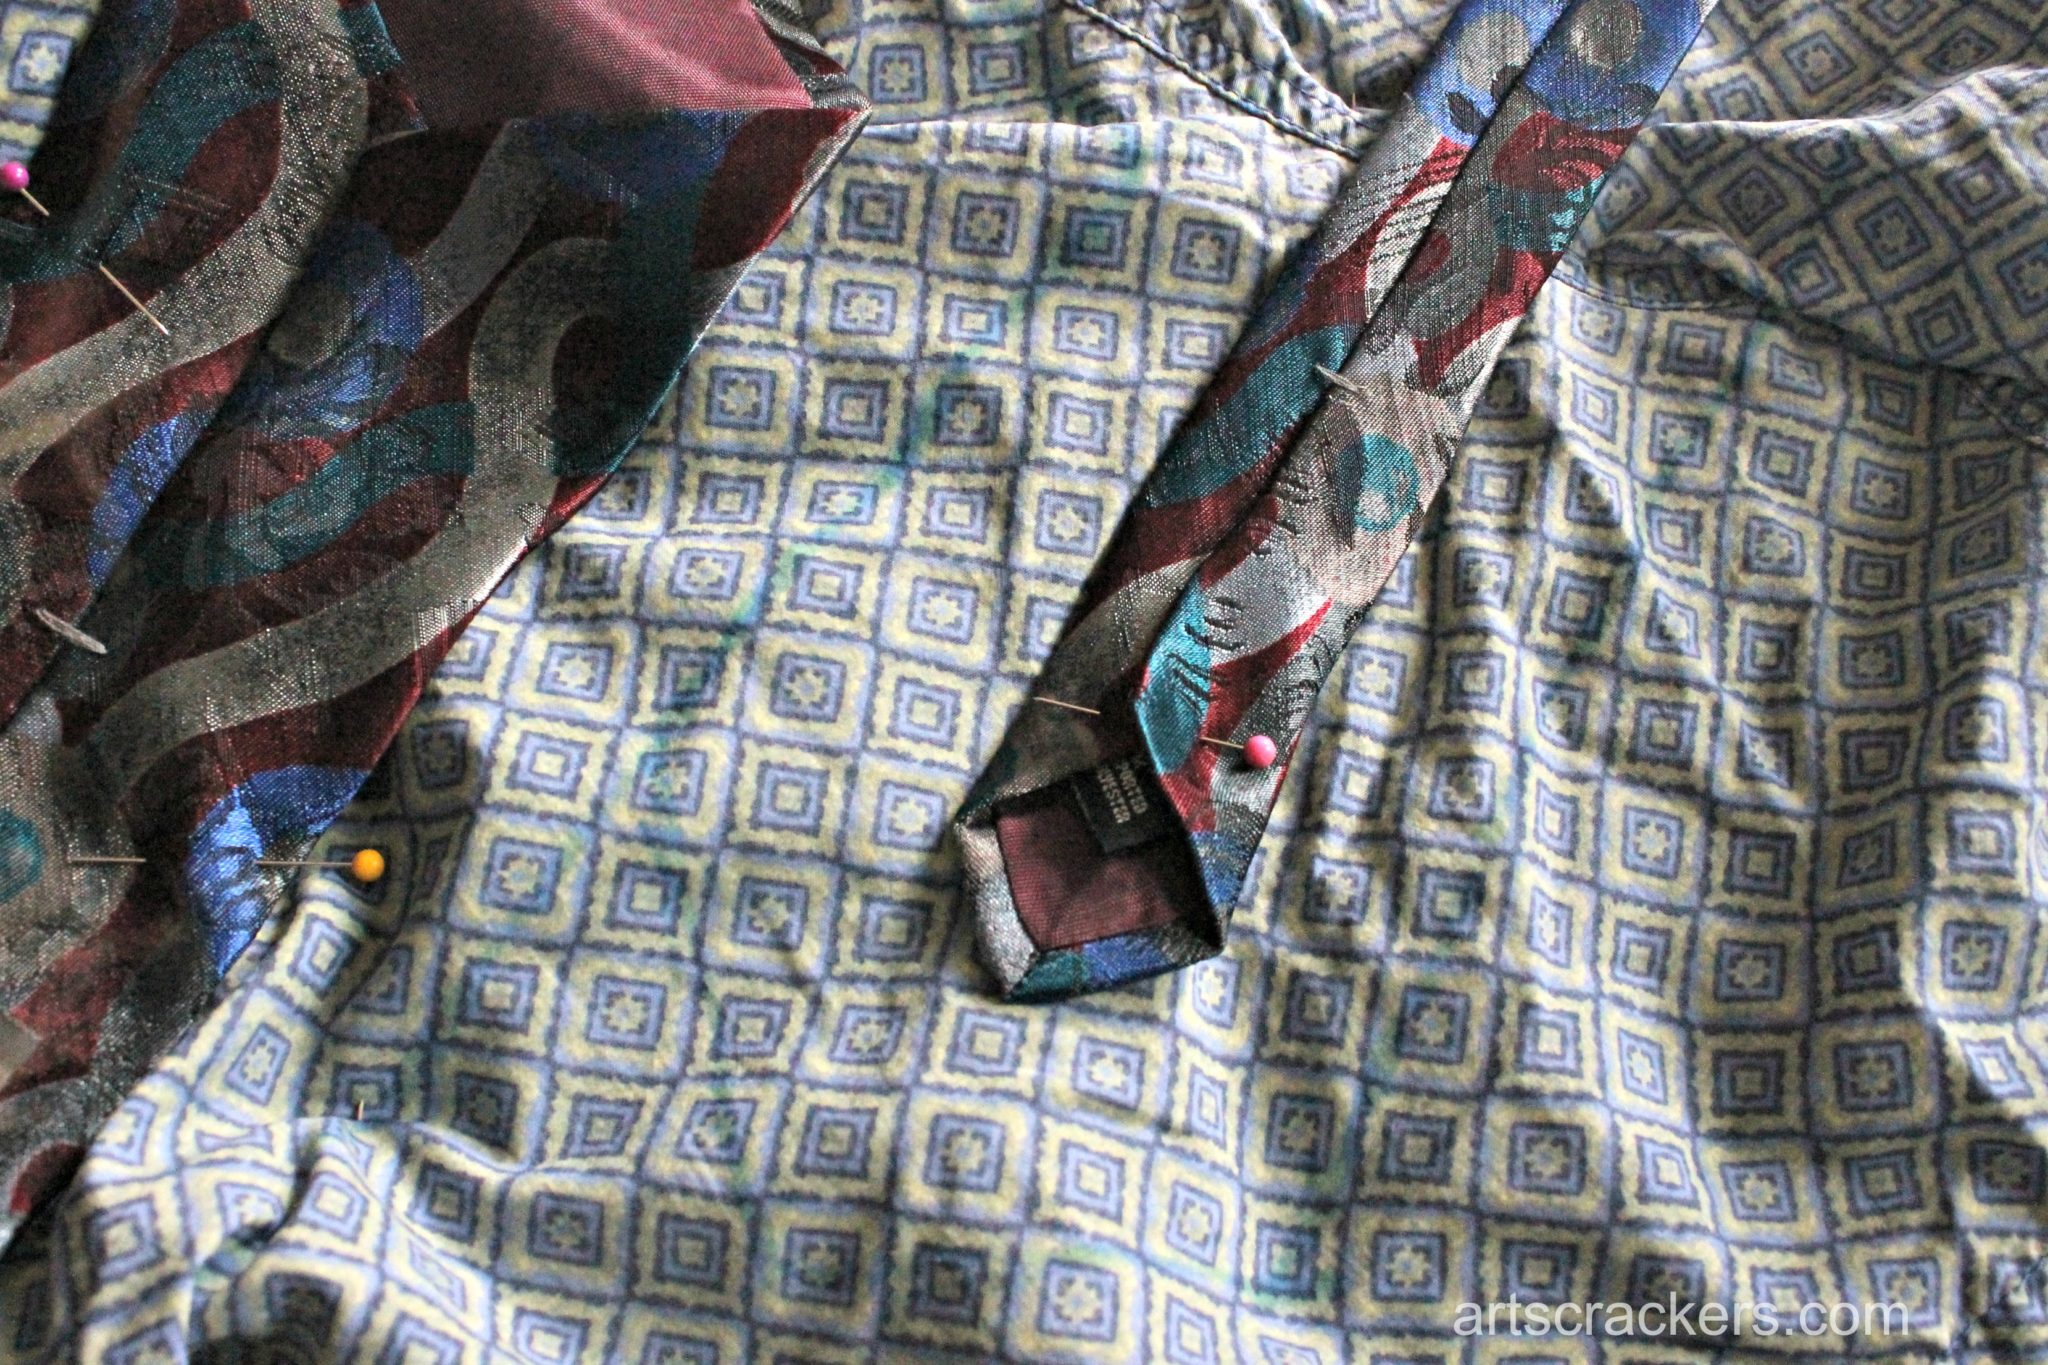
3. Using the light marker or fabric chalk, mark around the edges, about two inches out.
4. Once you are finished making cut lines, trim around the tie on them. Be careful you only cut one fabric layer at a time and go slowly over seam lines as the larger bumps can make your cut uneven.

5. Unpin the tie from the fabric. Iron the fabric flat. I would recommend ironing the back.
*Important* Be sure to check the fabric instructions for how hot the iron should be so that you do not ruin it. I am speaking from experience. I got antsy because the fabric was not flattening enough so I turned it up and burnt a hole straight through. Thankfully, I was able to mend it so you cannot even tell where the issue was, but it was a pain and a hassle.

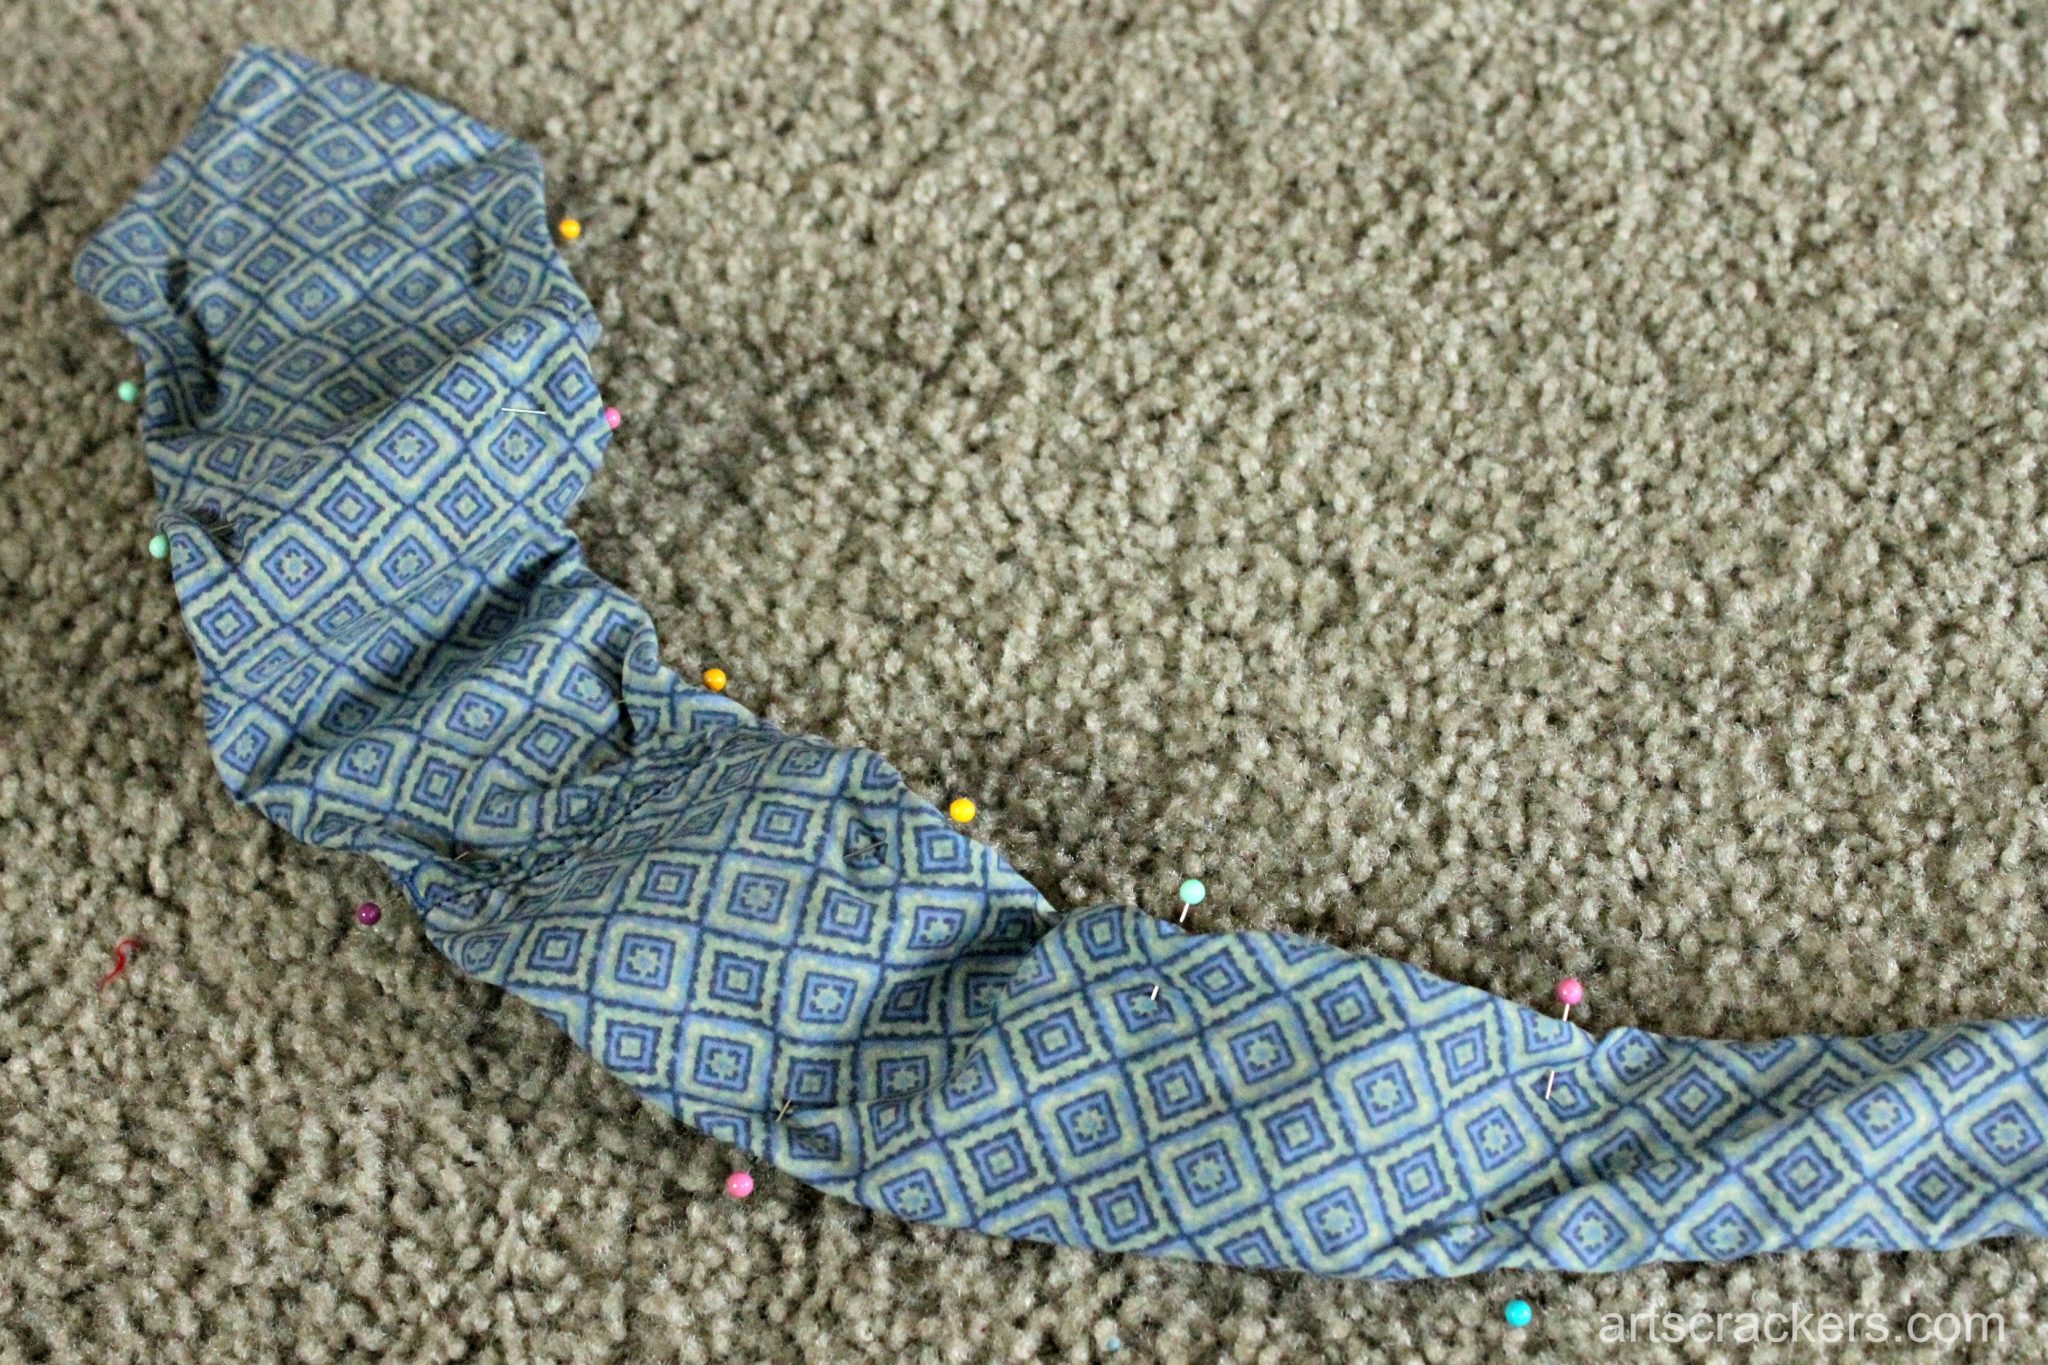
6. Lie the fabric, upside down (the part you want to show will be on the bottom) then put the tie on top upside down. Starting at the large end, begin folding the material over onto the tie and pinning down. Make sure your edges are clean and crisp when you fold them or it will look sloppy. Also, use enough pins that everything stays in place as it should.
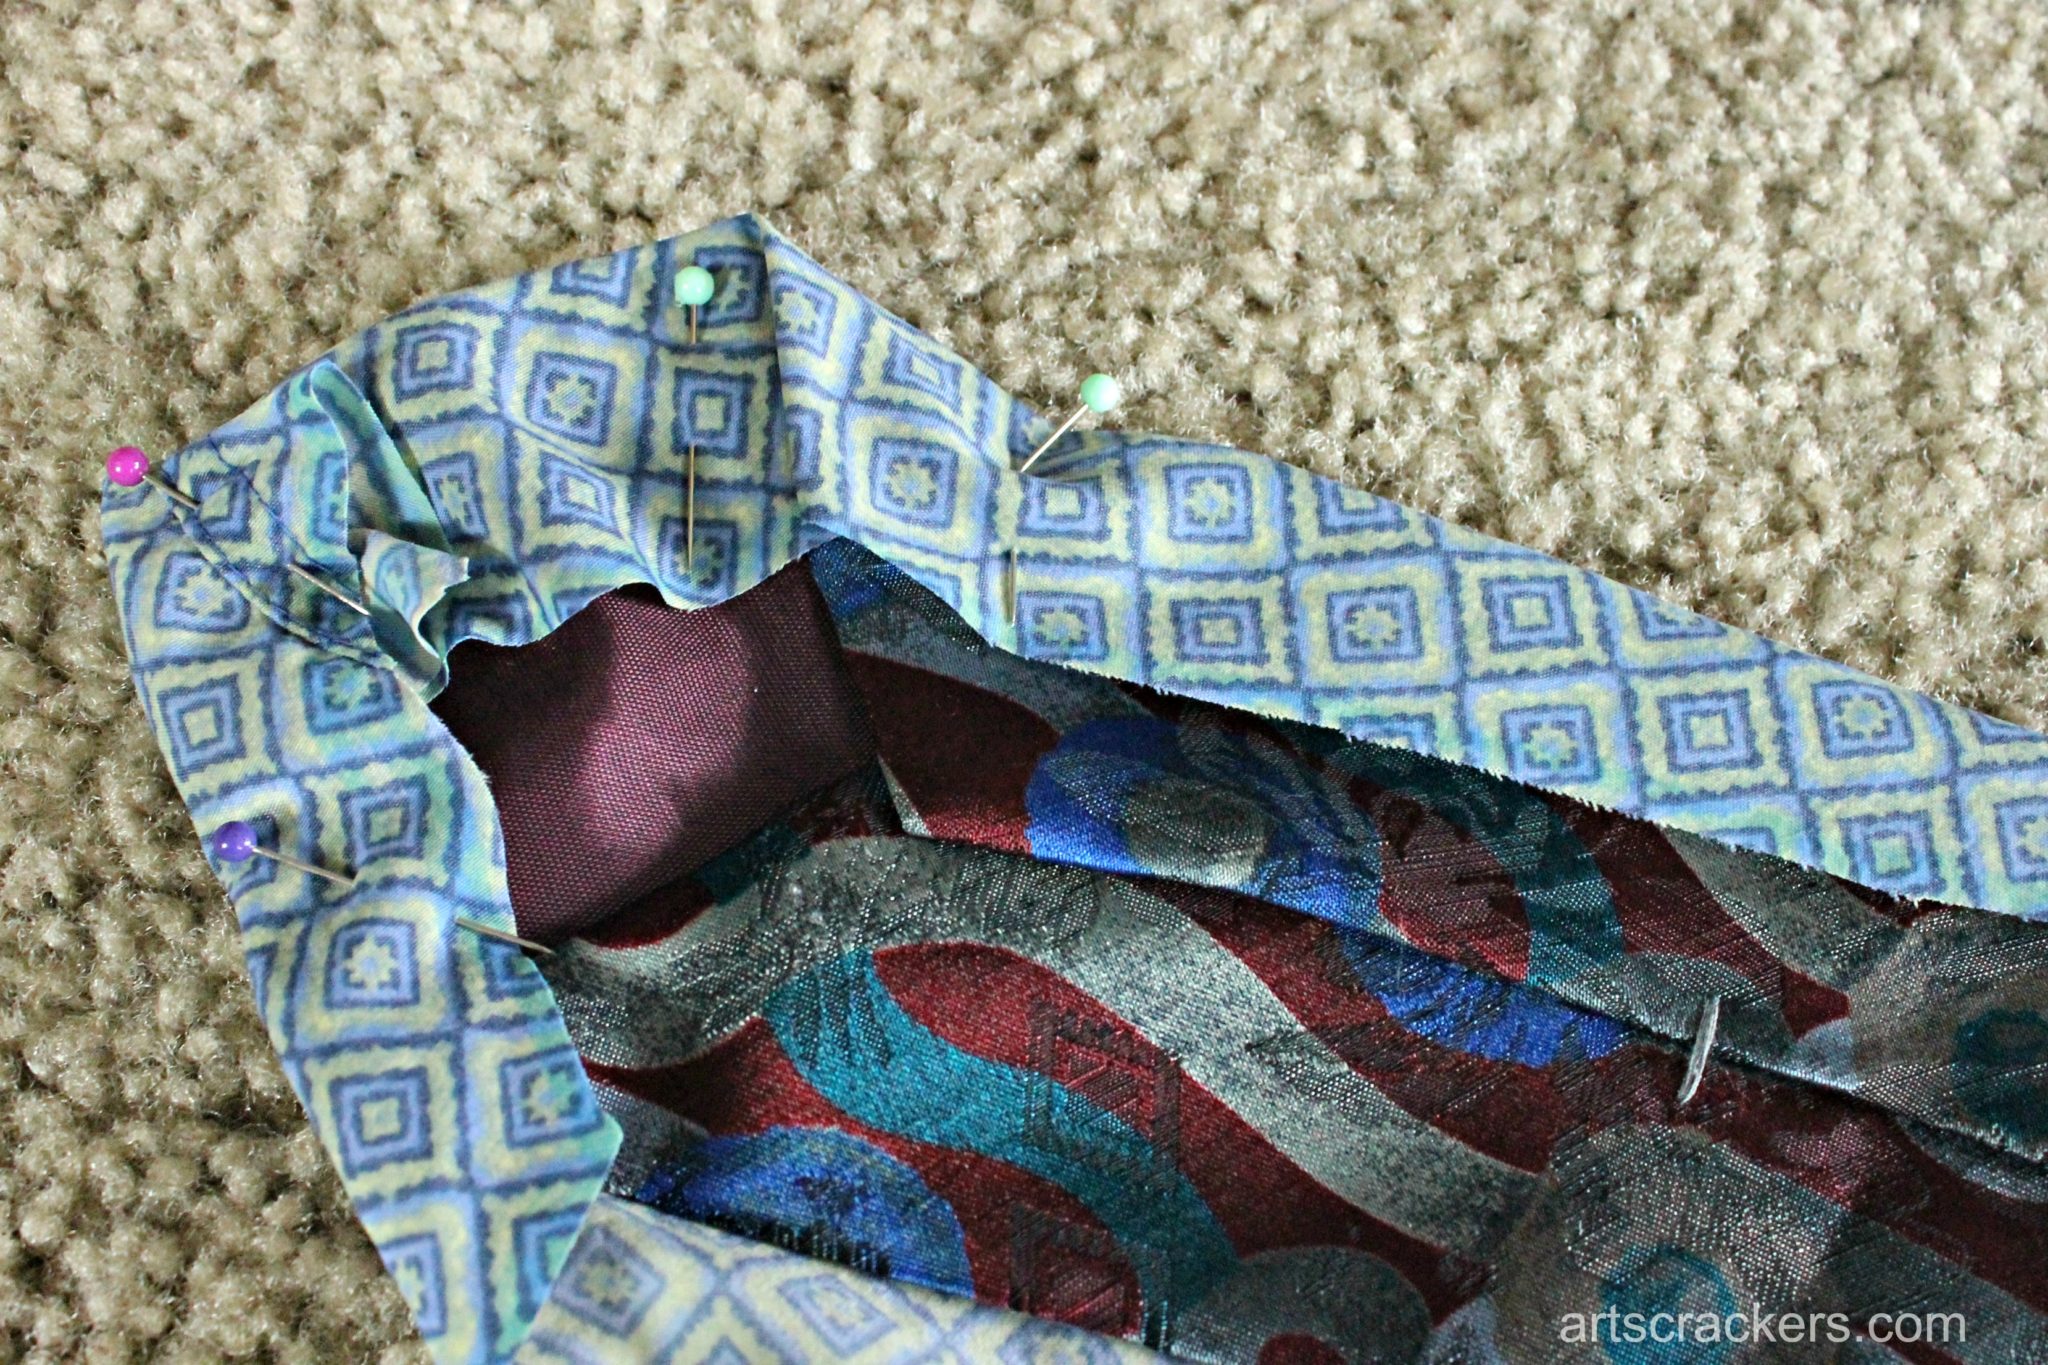
7. Continue pinning all the way down along the tie and finish off the bottom point the same as you did the large end. If the tie feels tight or bunched, stretch it out lightly and things should straighten up.
8. Begin sewing the fabric down on the back (where the stitches will not show.) I did a straight stitch around the entire tie about 1/8″ away from the edge, give or take.
*Important* As you sew, make sure you are only going through the fabric layer on the back and part of the old necktie and not all the way through or you will have random stitches showing on the front. If you need help sewing a straight stitch, you may find the resource at this link helpful.

9. After adding the straight stitch around the entire tie, trim off the excess material that may be on the back (anything that overlaps and makes things look lumpy) as well as the area around the loop where the back of the tie gets inserted, then use a whip stitch along the edges to help everything lie flat and prevent the fabric from fraying and unraveling.
*Important* As you sew, make sure you are only going through the fabric layer on the back and part of the old necktie and not all the way through or you will have random stitches showing on the front. If you need help sewing a whip stitch, you may find the resource at this link helpful.

10. Hand your child the fabric markers and let him or her make designs on the tie. My son chose to only use black and he drew a picture of his dad and scribbled on the small end. I added the word “Dad”, but if your child can write or is learning and willing to write it, that would be best. My son was simply not in the mood.
We also let him color pictures on the belt.
11. Go ahead and iron one more time to make sure everything is flat and crisp looking. This will also help set the fabric marker into the material.

You May Also Like
- 5 Ways to Show Someone You Care
- Zesty Burger with Veggies (great recipe for Father’s Day)
- Keep them Close with Minted
- Time Flies with Shutterfly
- The Ultimate Book of Barbecue
- Build a Fort in 5 Simple Steps
-What do you love about your father or how your husband is as a dad? Are you going to do these crafts? Share your pictures on myFacebook page or email them to [email protected].


What a sweet gift! I teared up a little reading the note cards (silly hormones).
Aw, thank you. He loved it. It was so simple but meaningful.
That is such a sweet gift idea!
Thank you, Menucha.
Pingback: 25 Father’s Day Gifts Preschoolers Can Make