

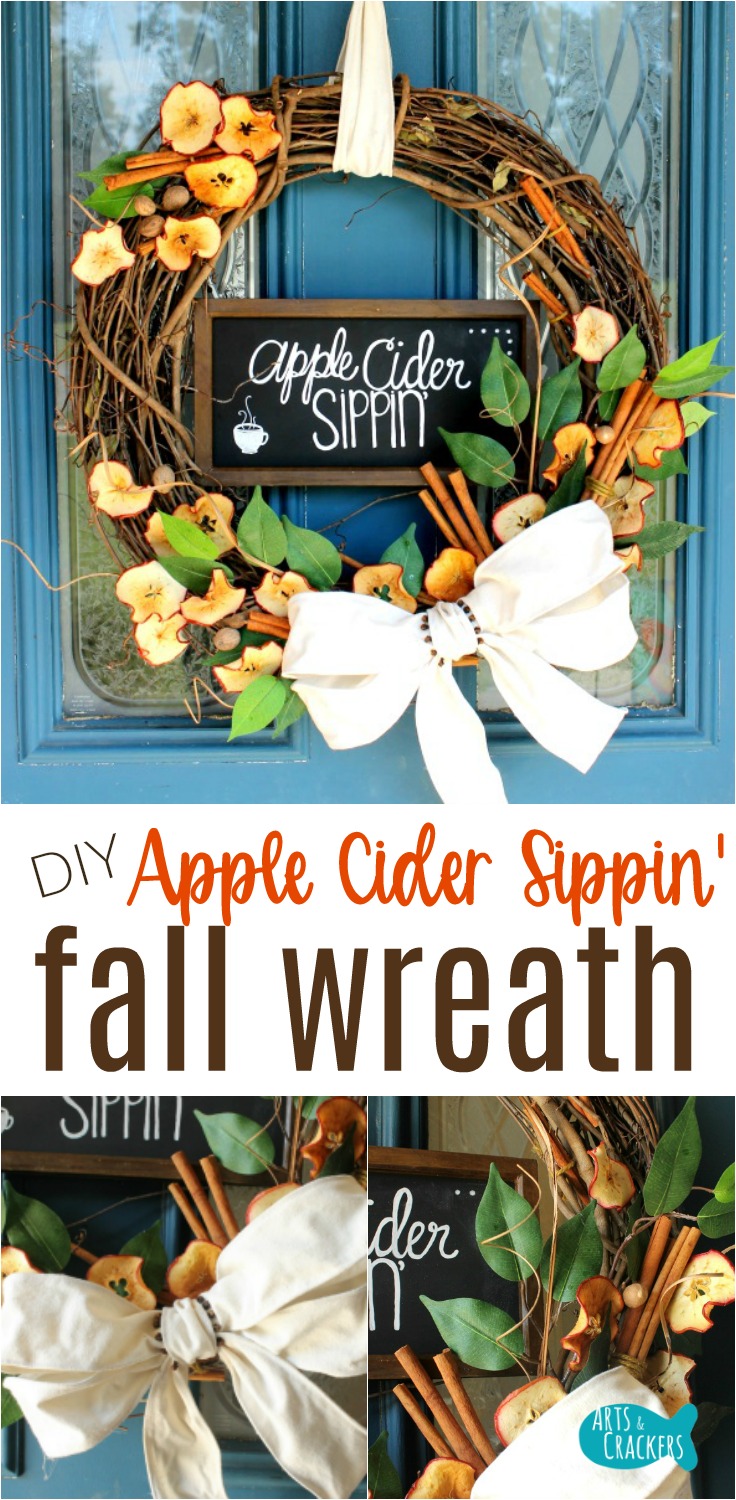
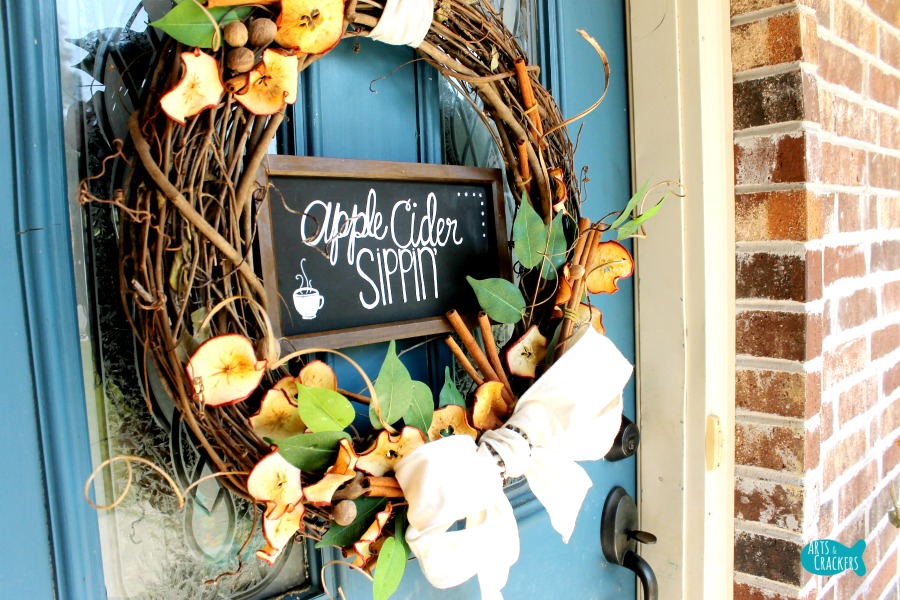
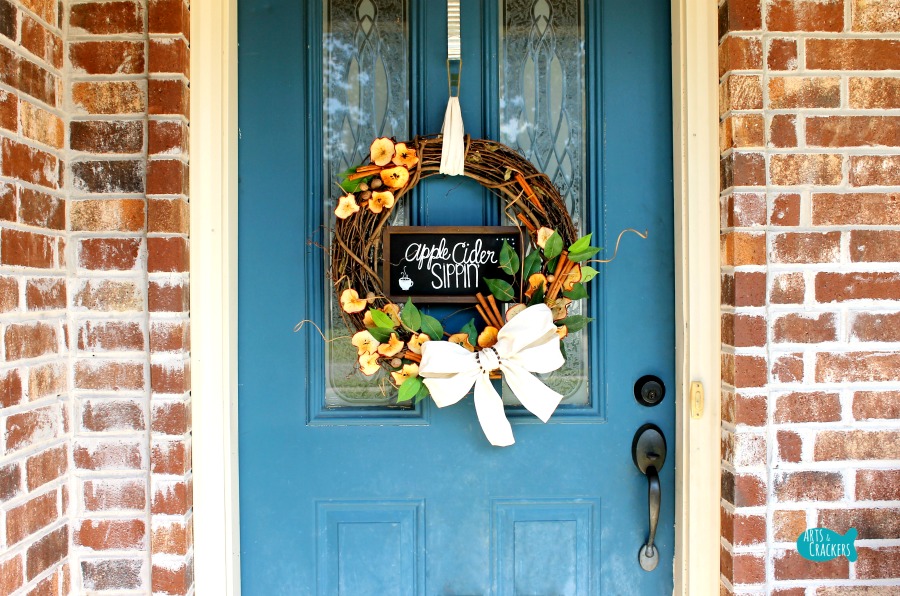
Some people are all about “Pumpkin Spice Everything,” but me? I’m all about that apple spice. Don’t get me wrong, I love pumpkin pie and the occasional PSL, but I’ll choose apple cider any day…year round. Now that it’s Apple Cider Season, I decided to share my love…in wreath form…with this Apple Cider Sippin’ Fall Wreath Tutorial.

This post contains affiliate links. By purchasing through these links, you help support the family behind Arts & Crackers at no added cost to you! Thank you!
The other day I ran to the grocery store during the day, with my kids, all by myself (this is not a normal occurrence for me–we usually head out when my husband gets home because I, er, may have a little problem with impulse buying foods.). We walked up to the front doors and I could see they were preparing for fall coming, but when I actually walked through those doors…oh. my. stars. The amazing fall aroma instantly rekindled my love of fall. I am so excited for this season to finally hit!
Oh, and the apple cider. *Swoon*
Of course, the grocery store preparing for fall means they were newly stocked with fresh apple cider. I’m pretty sure I got the first one. That’s what I’ll believe anyway.
You’ll love our Handprint Tree and Leaf Canvas Art Tutorial!

Those smells…those sights…those tastes…I just had to capture them in our new house, so I decided to do what I usually do–start another project. What better way to pull everything I love together than create a welcoming Apple Cider Wreath for fall, packed with fall scents and colors?!

Bonus: cinnamon is supposed to deter bugs and clove is high in antioxidants that help during cold and flu season–I used essential oils to pack a punch to welcome us home.
Wait…does cinnamon really deter insects? Ask the fly that started to come through our open front door, got to the wreath, then turned around and buzzed off. (This did not deter the wolf spider that got in though…but it’s better than nothing!)

Get ready to welcome fall with this gorgeous DIY Apple Cider Autumn Wreath.
PS, my door really needs a new coat of paint…what color would you paint it?

DIY Apple Cider Sippin’ Fall Wreath Tutorial
What you need:
Directions
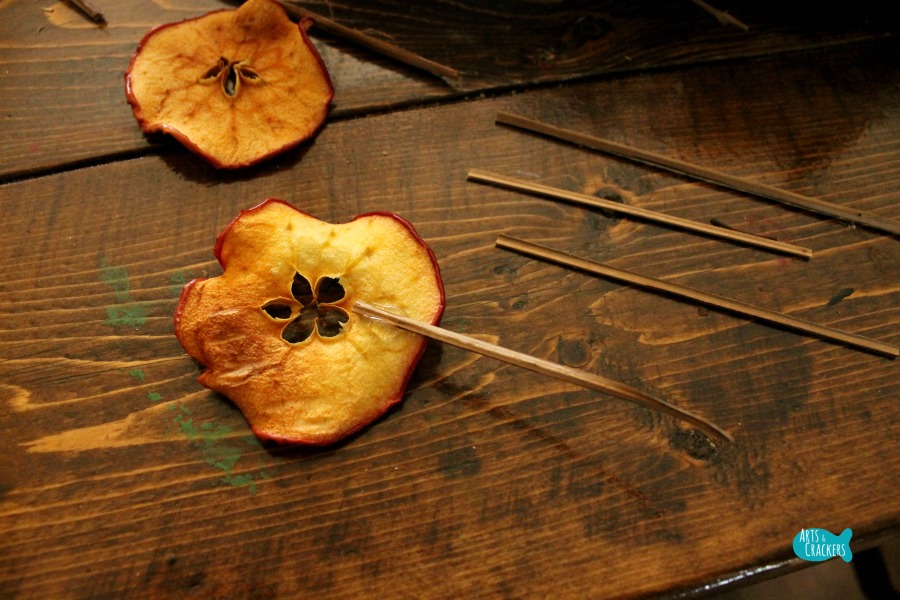
Begin by drying out some apples. This will take a few hours and you will want to make sure you go the crunchy route rather than soft and chewy. I used this recipe for drying apples.

Prepare a bow. There are several different ways you can tie this bow, but I chose to do a double-loop bow (and I really didn’t tie it like you tie a regular bow.). You can see how I did this by looking at the picture. Cut two strips then fold them to make two loops with the ends slightly overlapping. Cut another long piece and bend it in half (this will be the tails) and another short piece to wrap around the center. Assemble by tying the two loops together in the center then fanning them out. Lay the long folded piece in the middle then wrap the short center piece around it so it looks like a regular bow. Tie it all together in the back then flip it over and fan the loops back out to make everything look nice and pretty. If needed, add a dab of glue so it all holds.

Trial run! Set your decorations on the Fall Wreath without attaching them. Get a general idea of where you will want each item so you don’t have to undo anything once it’s glued down. I added most decorations around the bottom left corner then a little on the top left, leaving room for a ribbon at the top to hold the wreath.

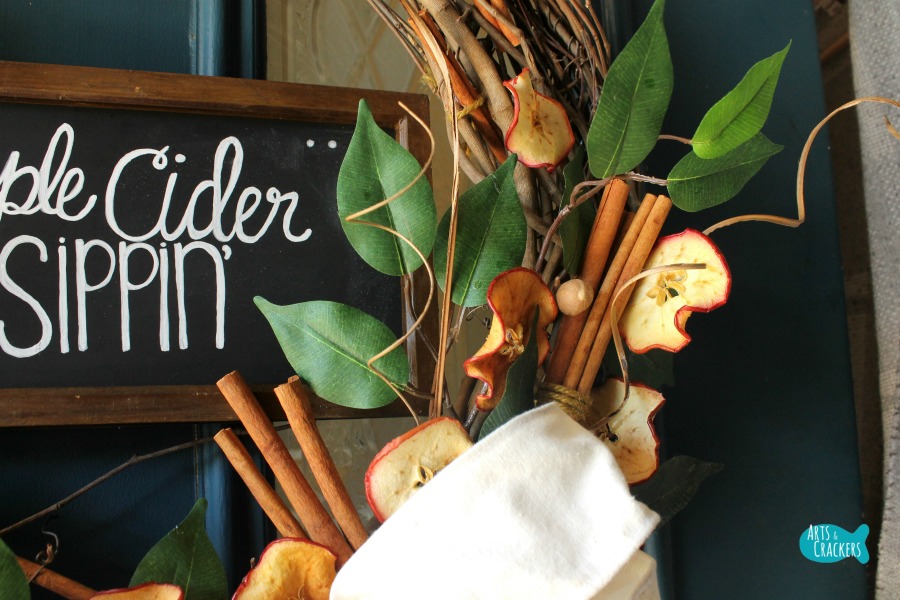
First, add some leaves here and there. I left most on short branches rather than adding them individually. These will add some nice color.
Attach the cinnamon sticks. I did this in bundles, so I’d tie a few cinnamon sticks together then tie that onto the wreath by threading the twine between the twisted branches of the grapevine wreath. Cut off the extra twine and add a dab of glue to keep everything in place if needed.

Add some of the curly ting ting here and there to add some volume and dimension to the wreath. I only added them to the bottom section, some pointing up from behind where the ribbon would be and some pointing left. You will likely need to trim the branches/reeds to a length better suited for the size of the wreath.
Cut up the extras that you have from the ting ting where it is flat and not twisted so that you have several small sticks. Glue these sticks to the back of the dried apples. Note: if the weather is humid by you like it is by me and you do not have a storm door or anything, you may want to go back through and add some Krazy Glue to make sure the apple slices do not fall off of your Apple Cider Wreath.
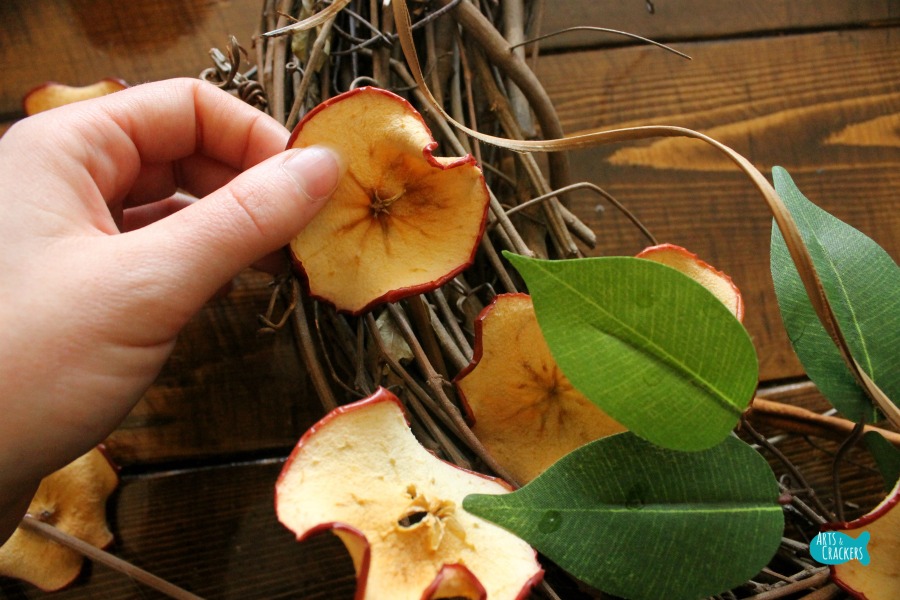
Once the glue has dried on the backs of the apples, slide them into the wreath wherever you want them. If needed, you can glue these in. Some spots should be tight enough that you don’t need to add glue.
Glue sticks to the backs of the whole nutmegs as you did with the apples, then slide them to decorate.

Using more twine, loop through the wreath and the back of the bow and tie the bow into place in the bottom right corner. If needed, add a little glue so it stays put where you want it.
Glue whole cloves between the bow and the top, center piece of ribbon on the ribbon bow. I added about 5 to either side.

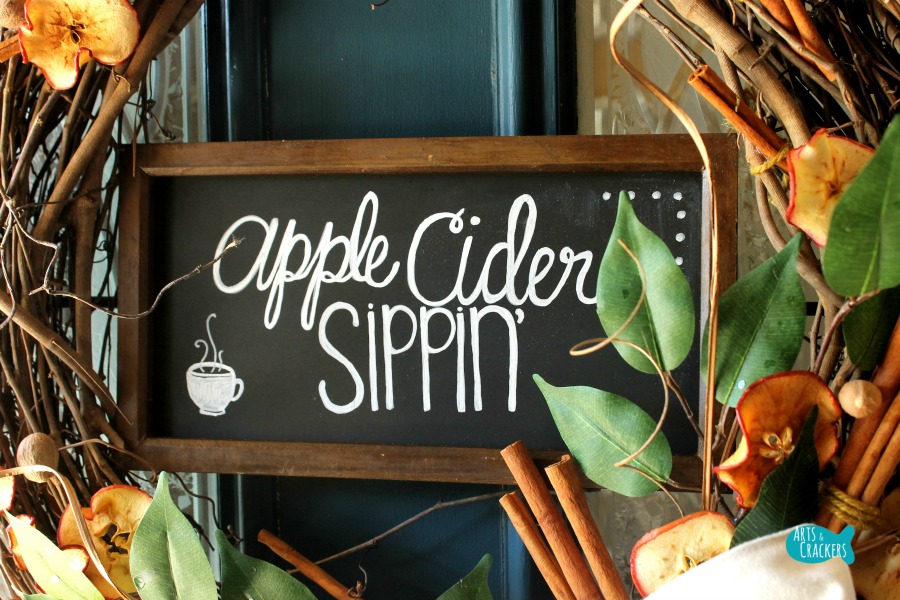
Prepare the chalkboard. I purchased one with legs on it–a chalkboard easel. Using a hammer and the edge of a sturdy bench, I carefully knocked the legs out of the back so I just had the chalkboard piece left.
Cut a sturdy stick so it fills the full length of the back of the chalkboard and will stick partway into the wreath on either side when centered. Glue the stick down into the center of the chalkboard using hot glue and additional super glue if more hold is needed.
Using a chalk marker, write the words you wish and draw the designs you wish. I used “Apple Cider Sippin'” and added a steaming cup of cider in the bottom left corner with a cute dotted border in the top right corner. The great thing about using a chalk marker is that you can use a damp cloth to erase and start over if needed, and it will stay besides that. Personally, I practice what I planned to write ahead of time with a regular pen and paper, so I knew about how I wanted it to look on the chalkboard.

Now to hang the wreath. Take a little more of the wired ribbon from earlier and loop it around the top of the wreath. Fold over the ends and hot glue it all together. Move the ribbon so the ends are not showing then glue it a little bit to the wreath if you need it to stay in place.

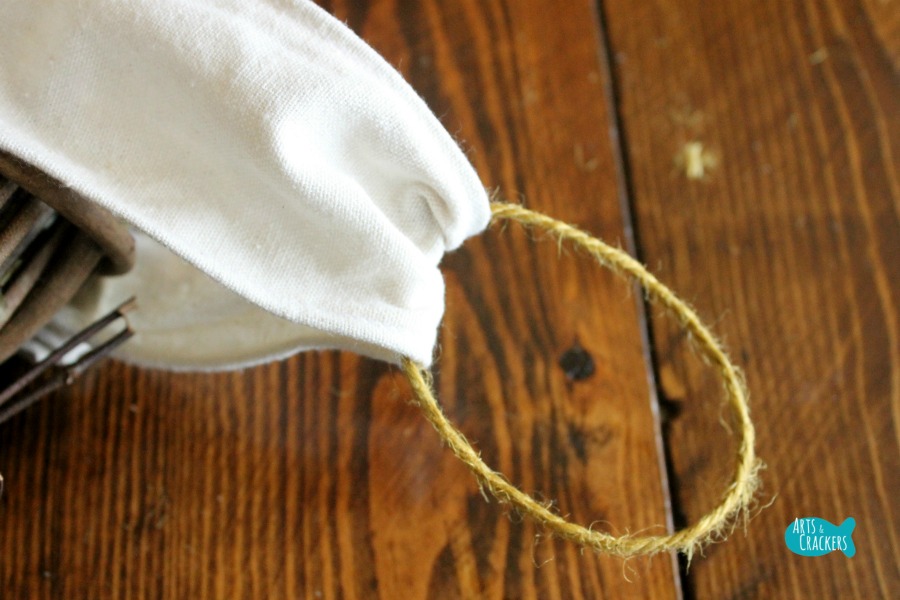
Tie a small piece of twine at the top of the ribbon loop to create another loop that will allow the wreath to hang on your wreath hanger. Hide the knot. If needed, add a dab of glue so it stays hidden under the ribbon. This may also be wise to prevent the knot from coming untied.
Hang your wreath proudly to welcome your guests (or yourself) when entering your home sweet home. This can also be hung indoors.
Carefully add drops of essential oils to the wood behind the bow. This will make the scent sensational.

Sip on this deeelicious Lingonberry Spided Cider while you craft!
Everyone will love this gorgeous Apple Cider Fall Wreath.


View all my Wreath Tutorial Posts
Read also: Paper Leaf Wreath with Paper Owl | Fall Paper Craft Tutorial and Handprint and Footprint Woodland Animals Canvas Wall Art


Thank you for sharing your talent.
Pingback: 12 DIY Fall Wreath Tutorials – Online Shop For Ornaments
Pingback: The Best Fall Front Porch Decor Ideas On The Internet - Home by Jenn
Pingback: 12 Easy DIY Fall Wreaths You Can Make At Home – Woolnose
Pingback: 12 Easy DIY Fall Wreaths You Can Make At Home – Home and Garden – Mix Of Tips
Pingback: DIY Autumn Wreaths For Your Home - My Home and Travels
Pingback: A Few Favourite Things - DIY Fall Wreaths + #Giveaway | A Few Favourite Things
Pingback: 20 Outdoor-Herbstdeko-Ideen - Aufgaben
Pingback: 20 Outdoor Fall Decor Ideas - Sweet Money Bee
I like this! It would be a good decoration for my front door.
Pingback: 12 DIY Fall Wreath Tutorials – Home and Garden
I like this! It would be a good decoration for my front door.