


 My boys are obsessed with anything and everything underwater, just like me. We enjoy going to aquariums, have a couple freshwater tanks and a saltwater tank at our house, walk the fish aisles at the pet store just for fun…you could say we are fish “fin-addicts” (you know, like fanatics…yes, I’m so funny.)
Now, I have all of these wonderful things I want to share with you about how this underwater addiction brought about my boys’ ocean-themed birthday party, but that’s a post for another day. Today I want to share how we brought this love to their birthday cake!
I really wanted to be innovative with this cake. We had a large crowd to feed and I wanted to make sure my kids had their own special “birthday boy” pieces. As you will see below, I made the basic cake for our guests then gave the boys each a fish cupcake that set neatly into the aquarium cake. When it was party time, we simple stuck candles in their cupcakes, they blew them out, then we pulled them off the top and got to cutting very basic shape pieces for the partygoers. Now, I can decorate fun cakes in fun shapes, but my cake-serving skills are not so great, so basic is best!
Looking at this cake, you may be thinking, “There is no way I could make that.” I want to assure you that it is not quite as difficult as it may look! The good thing about aquariums is that your base layer of frosting does not have to be perfectly flat; it can be wavy like water. If you follow the step-by-step instructions, this cake should be simple. Now, there are a few areas that may require more “skills”, but you can keep those parts basic and not add the extra touches I did and you’ll be golden.
What You Need
- Cake plate/board
- Two rectangular cakes
- Two cupcakes with liners (I made extras just in case)
- Frosting (you can make your own, but I save time by purchasing some from our grocery store’s bakery; I do not recommend canned frosting)
- Something round, like a cup or cookie cutter, a little wider than the top of the cupcakes
- Icing Spatula
- Food coloring (I used natural coloring for the blue layer, made from boiled red cabbage, and gel dyes for the rest)
- Graham crackers, crushed
- Colored decorating gel (I used black and white and would have used red had I had any)
- Candy rocks
- Candy fish (I used three orange and one yellow in total)
- Frosting bags
- Frosting couplers
- Frosting leaf tip, star tip, and round tip
- Candy peach ring
- Round cracker/cookie
- Candy eyes
- Chocolate chip pieces
Directions
1. First you will want to make sure the cake and cupcakes are completely cooled.
2. Spread a thin layer of frosting onto the cake board or plate. This will prevent the cake from sliding around.
 3. Carefully cut the cakes to make sure they sit flat. Place one upside down on the cake board/plate.
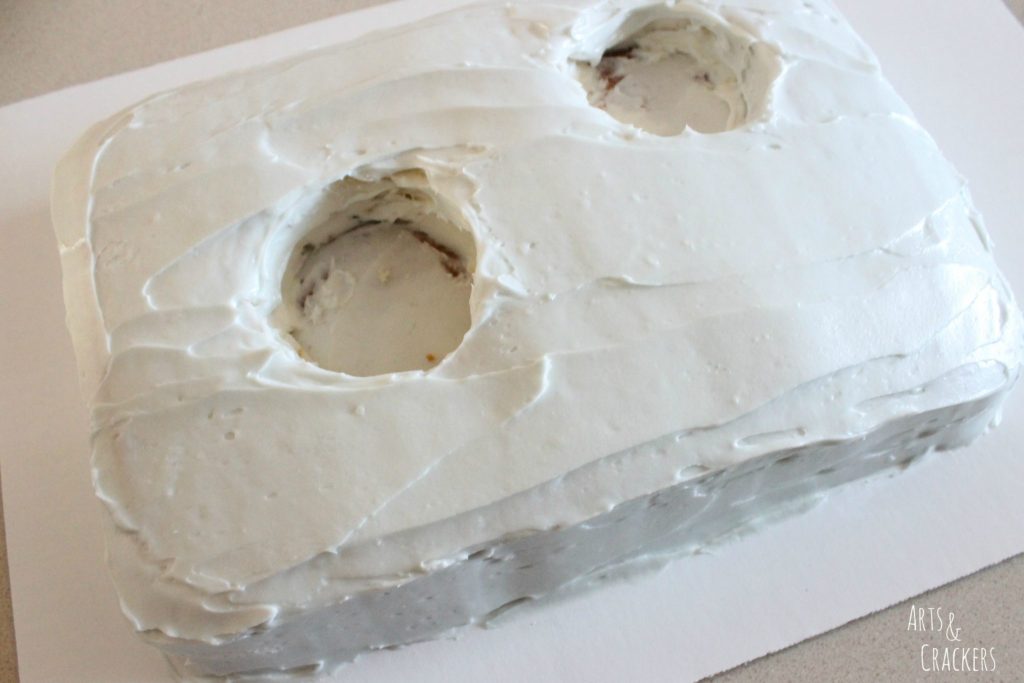
 4. Take the other cake and use the cup or cookie cutter to remove circular shapes. I did two of these as we had two cupcakes (one for each of my boys.)
 5. Add a layer of frosting to the top of the full cake on the board then place the cake with holes on top.
 6. Spread on a “crumb layer” of frosting. A crumb layer is the thin layer of frosting that will pick up all of the loose crumbs on the cake. It is important because it will help prevent crumbs from showing on your top layer. Let this layer sit a while to harden…overnight if you can (I did not personally wait that long, as my decorating was pushed out to the day of the party.)
7. Now it’s time to really get started on this cake! Dye some of the frosting a light blue color and scoop a bunch on top of the cake. Start spreading across the top of the cake and down over the sides until everything is covered. I also added some around the inside of the holes I made, but I did not frost the bottom of the holes. Come back through with the edge of the icing spatula and carefully scrape the frosting so it looks flat. It doesn’t have to be perfect. It is supposed to look like water, after all.
 8. While the frosting is still wet, sprinkle some crushed up graham cracker on the bottom edge of the top of the cake. Small pinches at a time works best. Tap down on the crumbs a bit if needed to make sure they stick to the frosting and don’t all fall off.
 9. Time to really decorate! Use some colored decorating gel to make fun coral designs. I made one that looks sort of like a tree. You can just add squiggles or something more intricate!
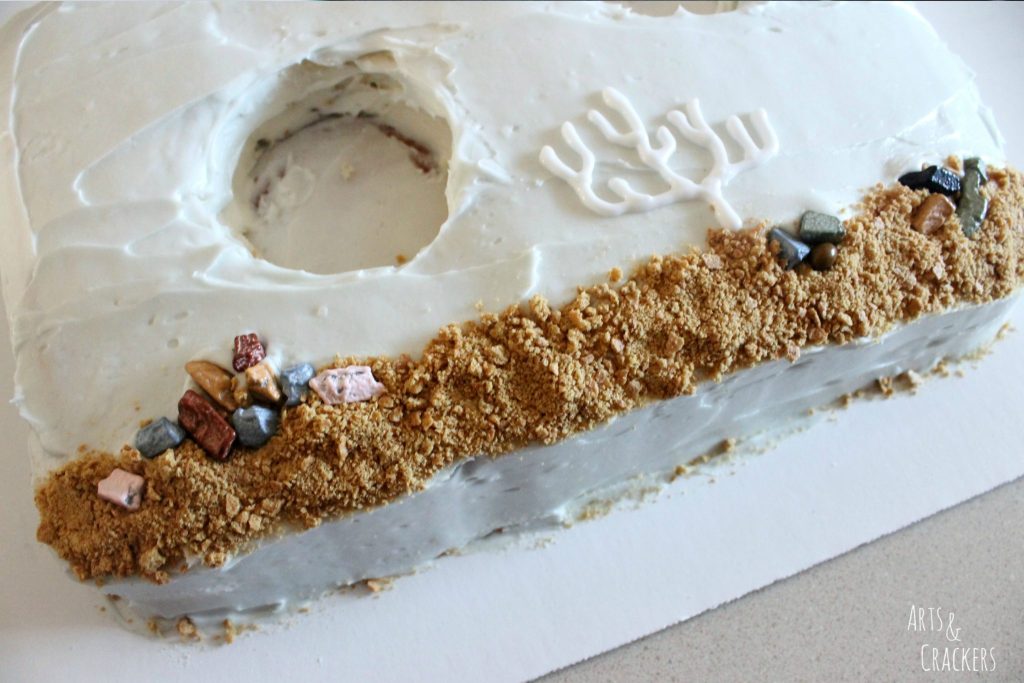 10. Add some candy rocks along the graham cracker sand. Push down gently so they stay in place and do not roll off or pull away the graham crackers.
11. Stick a few candy fish here and there. If you want, go the extra step and add gel to give them designs! I used orange fish and gave them white and black decorating gel stripes to make them look like clownfish.
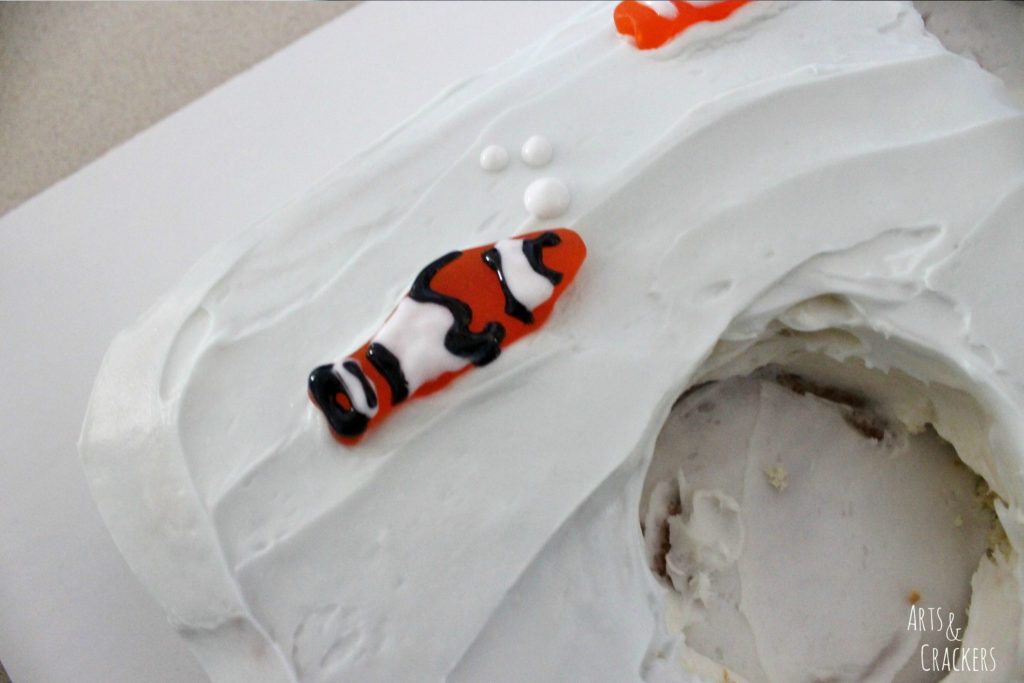 12. Add a few white gel icing bubbles above the fish.
13. Place the couplers into the frosting bags according to the package instructions then attach the decorating tips. For this step, you will need the leaf tip and green frosting. Squeeze lightly, starting with the tip at the top of the “sand” (with the “v” part of the tip on top; the frosting will squeeze out the sides and the metal “v” will give you that nice crease) and pull the frosting bag upward to make seaweed. Release and pull outward at the end to make pointy tips.
**Expert tip: Fold the top of the bag inside out over your hand before filling. This will help keep things a little cleaner. Fill the bags about 3/4 full then pull the top of the bag back up and twist it. Push the frosting down a little by squeezing then squeeze a little frosting back into the bowl to make sure any air bubbles are out.
 Yellow Tang Fish Cupcake!
 Yellow Tang Fish Cupcake!
Okay, so apparently I don’t have all the step-by-step pictures for this one, and the quality isn’t great (lighting!) but hopefully you can get the picture.
14. Use an icing spatula to spread some yellow frosting on top of the cupcake.
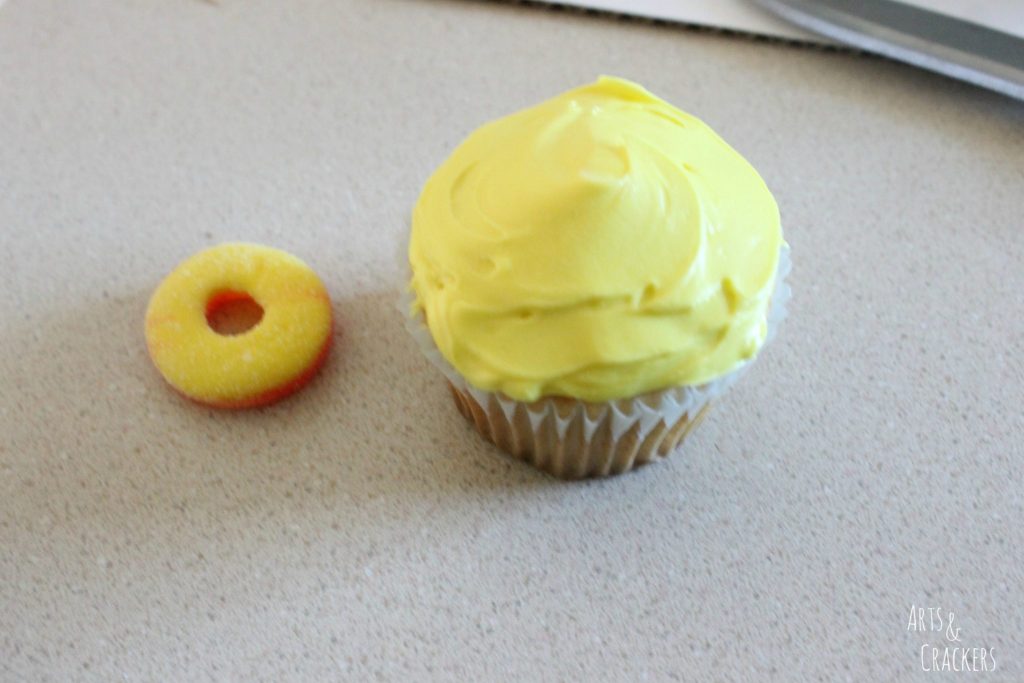 15. Slice a candy peach ring in half and stretch/flatten just a bit. This will be your top and bottom fins, so stick it to the top and bottom of the frosted part of the cupcake.
16. Flatted a yellow candy fish then cut it into three pieces–the tail, the body, and the mouth.
 17. Stick the candy mouth where your fish’s mouth should be, your tail fin on the back, and round the corners of the body part with your fingers and stick it in the middle of your cupcake for another fin.
18. Place a candy eye on the frosting a little above the mouth then add some accents…I used a white decorating gel stripe across the middle of the fish’s body so it looks like a yellow tang (my favorite fish!) then added a smile and lines on the side and tail fins using black decorating gel. Set aside.
Puffer Fish Cupcake!
19. Repeat step 13, only this time you will be using a beige-colored frosting and the star tip. Squeeze gently, pressing the tip near the top of the cupcake, and once it has a decent amount coming out in that spot, release the pressure and pull up to make the frosting look like spikes. Do this until the entire top of the cupcake is covered.
 20. Cut your round cracker in half then cut in half again. Find your two best pieces and use these as fins. Stick them into the frosting on either side of the cupcake.
 21. Cut off the curled tip of two chocolate chips. Touch the bottoms together and stick it into the center of the cupcake to make lips (see finished pictures above or below) and add two candy eyes above it. Set aside.
Finish the Aquarium
 Finish the Aquarium
22. I went a little further and added more decorations to the cake. I used a round tip and a star tip to make orange frosting shells (use the scalloped shell method* below for these.) The round tip was used to make a triangle then I did a scallop over the top of the triangle. Be careful when making these over the graham cracker crumbs, as the crumbs may pull up and make a mess.
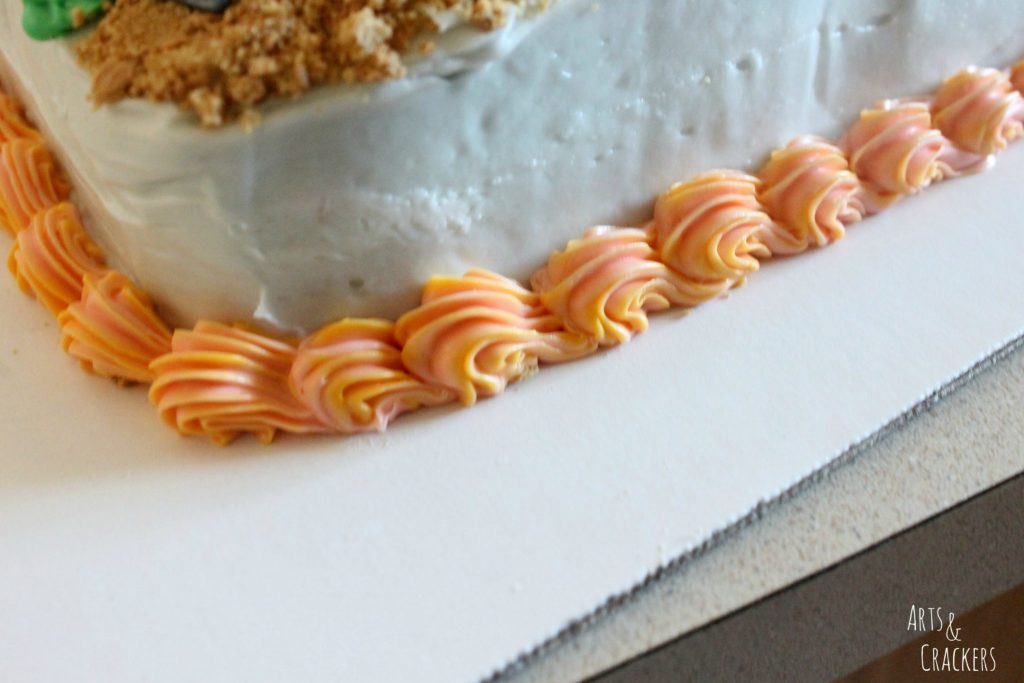
 23. Add scalloped shell border around the base. I did a coral color for this. *To make shells, you will use the star frosting tip and it is very similar to how we did the puffer fish. Start with the tip near the base of the cake, squeeze gently so frosting begins to come out then pull up and forward very slightly and come back around and pull back towards the cake plate and release. Do the next scallop right over the end of the first and continue this way all the way around. If you need more help with cake decorating tips, I recommend checking out YouTube! Perhaps I will do a simple cake decorating series in the future…would you like to see that?
 24. If you want, you can add a few more small accents like I did. I simply added some pearls using white decorating gel then went back to the green frosting and added a little more seaweed from the bottom.
 25. Place the cupcakes into the holes on the big cake and you are ready to go! I found these adorable fish candles to go along with it.
 Light those candles, you are ready for of-fish-ally the coolest party ever!
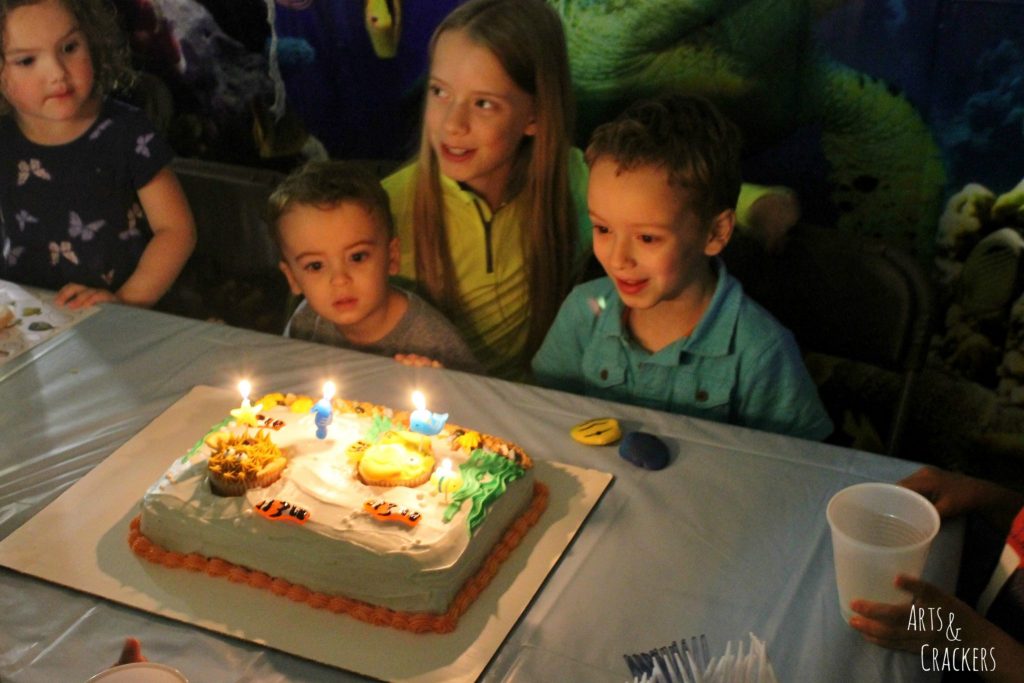 PS, the cake was a delicious hit! My youngest was contemplating sneaking a bit of his brother’s cupcake.
 Love cupcakes and cake decorating? You’ll love these Chewbacca Cupcakes! Super simple and there’s even a video!
Stay tuned! I’m feeling some more sea creature cupcake tutorials are necessary in the near future! PLUS, my party post with some fun activities and more ocean-themed tutorials coming soon!
Know someone who could use this? Hit the “share” buttons below! Be sure to follow Arts & Crackers on social media (buttons at the top right of the page.)
You May Also Like
- DIY Biplane Cupcakes
- DIY Chewbacca Cupcakes
- DIY Yoda Cupcakes
- Underwater Learning Activities with Finding Nemo and Books
- Sugar Cookie Flower Pots Tutorial
- Stuffed Party Celery Sticks Recipe
SEE THE 2015 HOLIDAY GIFT GUIDE
Who do you know who loves all things underwater? Which type of fish or sea creature is your favorite? Share with me in the comments below.
If you decide to do this project, I would love for you to share on my Facebook page or email me at [email protected]!


Pingback: Hidden Treasures Ocean Coloring Page