

Disclaimer: I received a free product for my post! These views are my own and were not
at all influenced by the party who gave me this opportunity..
 Handmade items from the heart are always the best. A little extra time and effort to add a personal, thoughtful touch can mean the world to a loved one. For this reason, I love personalizing everything I can from the gifts themselves to the wrapping paper and the cards. Card making, especially rubber stamping and embossing, has always been a passion of mine; I am not a fan of plain wrapping paper and store-bought cards, so even when I do not have much on hand I throw something special together.
Click here to visit their website
I received a kit with a sample of the new Spellbinders Celebra’tions collection by Richard Garay. It came with some die cut pieces, cardstock, stamps, and embellishments as well as some instructions to make a neat card and a treat bag.
What I Love
The Spellbinders Celebra’tions papercrafts set is fun, funky, and so cute! Everything is made to coordinate which is awesome because it takes out some of the guesswork! I looked on their site and there are so many options available from dies to stamps to inks to embossing folders and more. I would list it all, because they’re awesome, but I will let you go see for yourself. The set is meant to be cheerful to celebrate events such as birthdays, giving thanks, surprises, just because…there are cute little animals, flowers, doilies. I really like that the sets are bright and colorful and bring a smile to your face. This collection fits perfectly for summertime celebrations.  Spellbinders has great-quality products at reasonable prices. They are sturdy and truly will help you create special and memorable crafts. The Celebra’tions collection would work well for wedding party favors, birthday decorations, baby shower invites, even labeling items around your home. These make great Make and Take projects for hostesses.
As I mentioned above, my kit came with the makings for two crafts as well as a stamp set. Both crafts sent to me came with instructions of what to make. I do not believe they do this for each order, it was simply for me to sample; however, you can find a large variety of paper craft ideas with a list of the Spellbinders products used to create each. I decided to do one of the projects by the directions, but I altered the second just a little bit.
The first craft I received to make was the “Best Day Ever Treat Bag.” It used the Pixie Play Cardstock, Whirl White Cardstock, Build-a-Tag One Die Template, Fun Tags Stamp Set, Odacious Orange Ink, Pretty Plum Ink, Pixie Play Ink, Linen Thread and also required foam squares and brown paper treat bags. I loved the suggestions they gave me to overlap different cutouts–the Celebration tag was sent in two different stamp colors. They suggested cutting out the “Celebration!” banner from the purple tag and overlapping that onto the “Celebration!” banner on the orange tag! Why didn’t I think of that?! It was so simple and adorable. 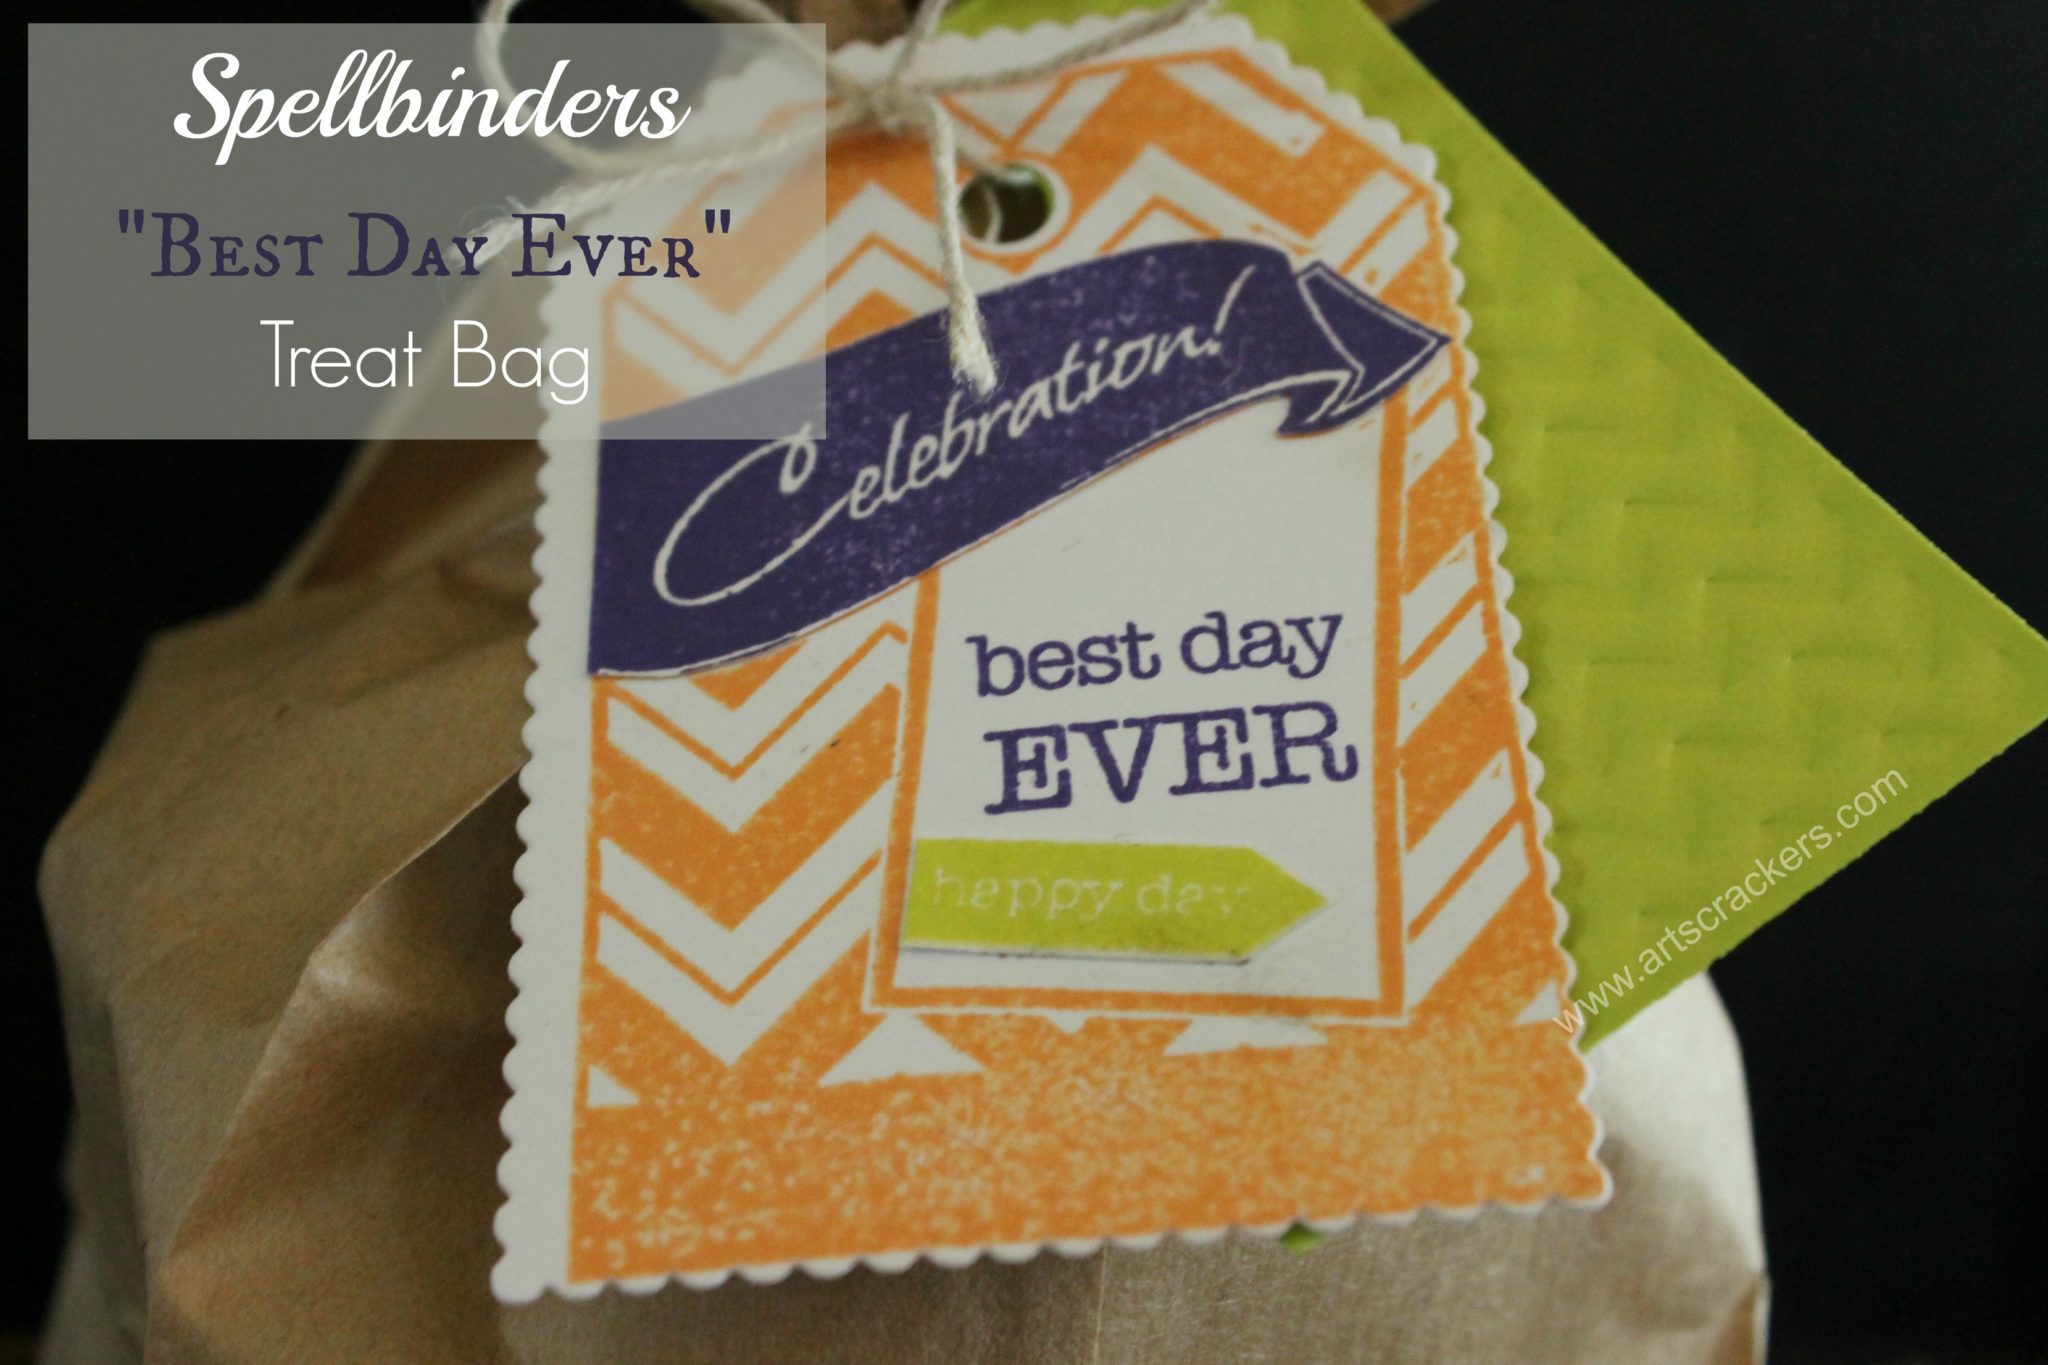 The second craft I was to make was the “Celebrate Party Hat Card” (pictured below.) It uses Golden Glow Cardstock, Whirl White Cardstock, Cool Carribbean Cardstock, Captivating Coral Cardstock, Prints, Sea Spray Ink, Linen Thread, Create-a-Cone Die Template, Enhanced Banner Die Template, Many Words Stamp Set and also required foam squares and sequins. While it was cute, I had no one to give it to. Instead I made a “Poppy Thinking of You” card on a stick for a very good friend going through a difficult time. She and her husband love Oriental Poppy flowers and they are hard to find in our area so when I found them at a garden center out of town I just had to get them for her to plant in her garden and this card goes perfectly with it! I used most all the same pieces sent to me, but altered them some. Do you want to make my card? Follow my quick instructions at the bottom.


What I’m Not Huge On
After receiving handy kits to make some of the Spellbinders paperart, the only thing I would have to say I wish Spellbinders had was pre-prepared kits to make some of the crafts. While I would love to buy a ton of supplies and get creative, not everyone who wants to craft has the time or inspiration to piece something together themselves, so paper craft kits with instructions would be a great option! Overall, if you love stamping and cheering up loved ones, the Spellbinders Celebra’tions Collection is definitely for you! It is affordable, adorable, and a cut above the rest. It has helped to bring back my love (and obsession) of paperart!
Poppy Thinking of You Card on a Stick Instructions

- Fold the Carribbean Cardstock in half. They sent a small rectangular piece so it made a little square when folded.
- Cut some Whirl White Cardstock to fit the front with a little blue left showing around the edges then attach it with glue, glue dots, or adhesive squares.
- Cut some polkadot prints cardstock to fit inside the white with a little white showing around the edges and adhere.
- Now decide which way you would like the card to open. I had mine open like a typical card, from the side, but you can also have it open from the bottom with the fold on top.
- Out of the Golden Glow Cardstock Create-a-Cone Die Template, cut a small banner similar to the Enhanced Banner Die Template but a little bit shorter.
- Using the Many Words Stamp set and some ink, stamp “Thinking of You” onto the white Enhanced Banner. I actually used a layer of washable marker instead as I did not have ink handy.
- Tie the Linen Thread into a bow and set aside.
- Overlap and adhere the two Captivating Coral Cardstock flowers. I skewed them a little bit so you could see both layers of petals. Cut a circle out of the polka dot prints to match the background and use a foam square to stick it into the middle of the flowers. Here I used a black permanent marker to make little dots (poppy seeds) in the center. You can curl up the petals on the top flower a little bit to make it pop even more.
- Find a good placement for each piece and do a dry run. I always test out how the card looks before I attach anything to make sure everything looks as it should.
- Once you know the placement, start layering. First, glue the banners, then set down the bow and use a foam square to attach it and the flower to the card.
- Using a nice pen (I used a small, black calligraphy pen,) write “Just poppy-ing in to say I’m” above the “Thinking of You” banner. Of course, make sure it is all placed so that the wording flows or it will sound like your sentence does not make sense.
- Glue on the sequins to embellish.
- When your card is complete, glue on a large popsicle stick to the back and let dry. Now you can stick the card in a pot of flowers as a cute gift to give to someone who needs a smile.
Bonus tip: Don’t have foam crafting adhesive squares? I actually cut up and used some extra Command Hook mounting strips I had lying around and it worked out well.
Know someone who could use this? Hit the “share” buttons below! Be sure to follow Arts & Crackers on social media (buttons at the top right of the page.)
-Check out the Spellbinders Celebra-tions Collection here; what will you make?


How creative and helpful. I love the chevron cardstock!
Thank you! I do too; so cute!
I LOVE your card on a stick! I’ve never seen that before. Pinning!
Glenna @ My Paper Craze
Thank you Glenna!
So cute!! Totally pinning this!
Thanks! Their collection is awesome!
I have just purchased the celebration oval die set. I’m really disappointed ….. unless it’s me I do not seem to be able to line them up very well so that I have a neat stitched edge. Has anybody got any suggestions ? 🙂 xxx
Hope you can get it figured out! I am actually not very familiar with using a die cutting set. The ones I received in my set were pre-cut. Perhaps try to post on their Facebook page? There are tons of crafters there who use the die cuts who could probably help you!
Hello Karen, I just wanted to make sure you received help regarding your Celebra’tions Oval die set. I actually work for Spellbinders and our Customer Service is here to help you can reach Karen at 888-547-0400 she is available to help you. Have a wonderful day.
Thank you for your response Terre!
I love how creative you are and what you made! Definitely thinking outside the box! I can’t wait for my kit to arrive and see what I can create!
Thanks! You will definitely have fun making the crafts!
This is sooo neat and creative!
Thanks girl!
Pingback: Printable Seed Packet Valentines | Non-Candy Valentines